I really love authentic Italian pizza. The kind with the thin crust that gets blistered and charred in the wood oven. My favorite place to get it around here is Pizzeria Orso, but I have been trying to make it at home. Step one is to get a pizza stone. I leave mine on the bottom rack of the oven. As long you are heating it with the oven (not sticking a cold stone into a hot oven) it will be totally fine to leave it in there all the time. In fact, heating it frequently will help keep it clean by burning any spills to dust. I’ve even left it in there on the self clean mode – totally fine and now very clean! It will take longer for your oven to preheat with the stone in it, but it will help keep the temperature even and constant. You will also need a pizza peel to transfer the pizza to the stone.
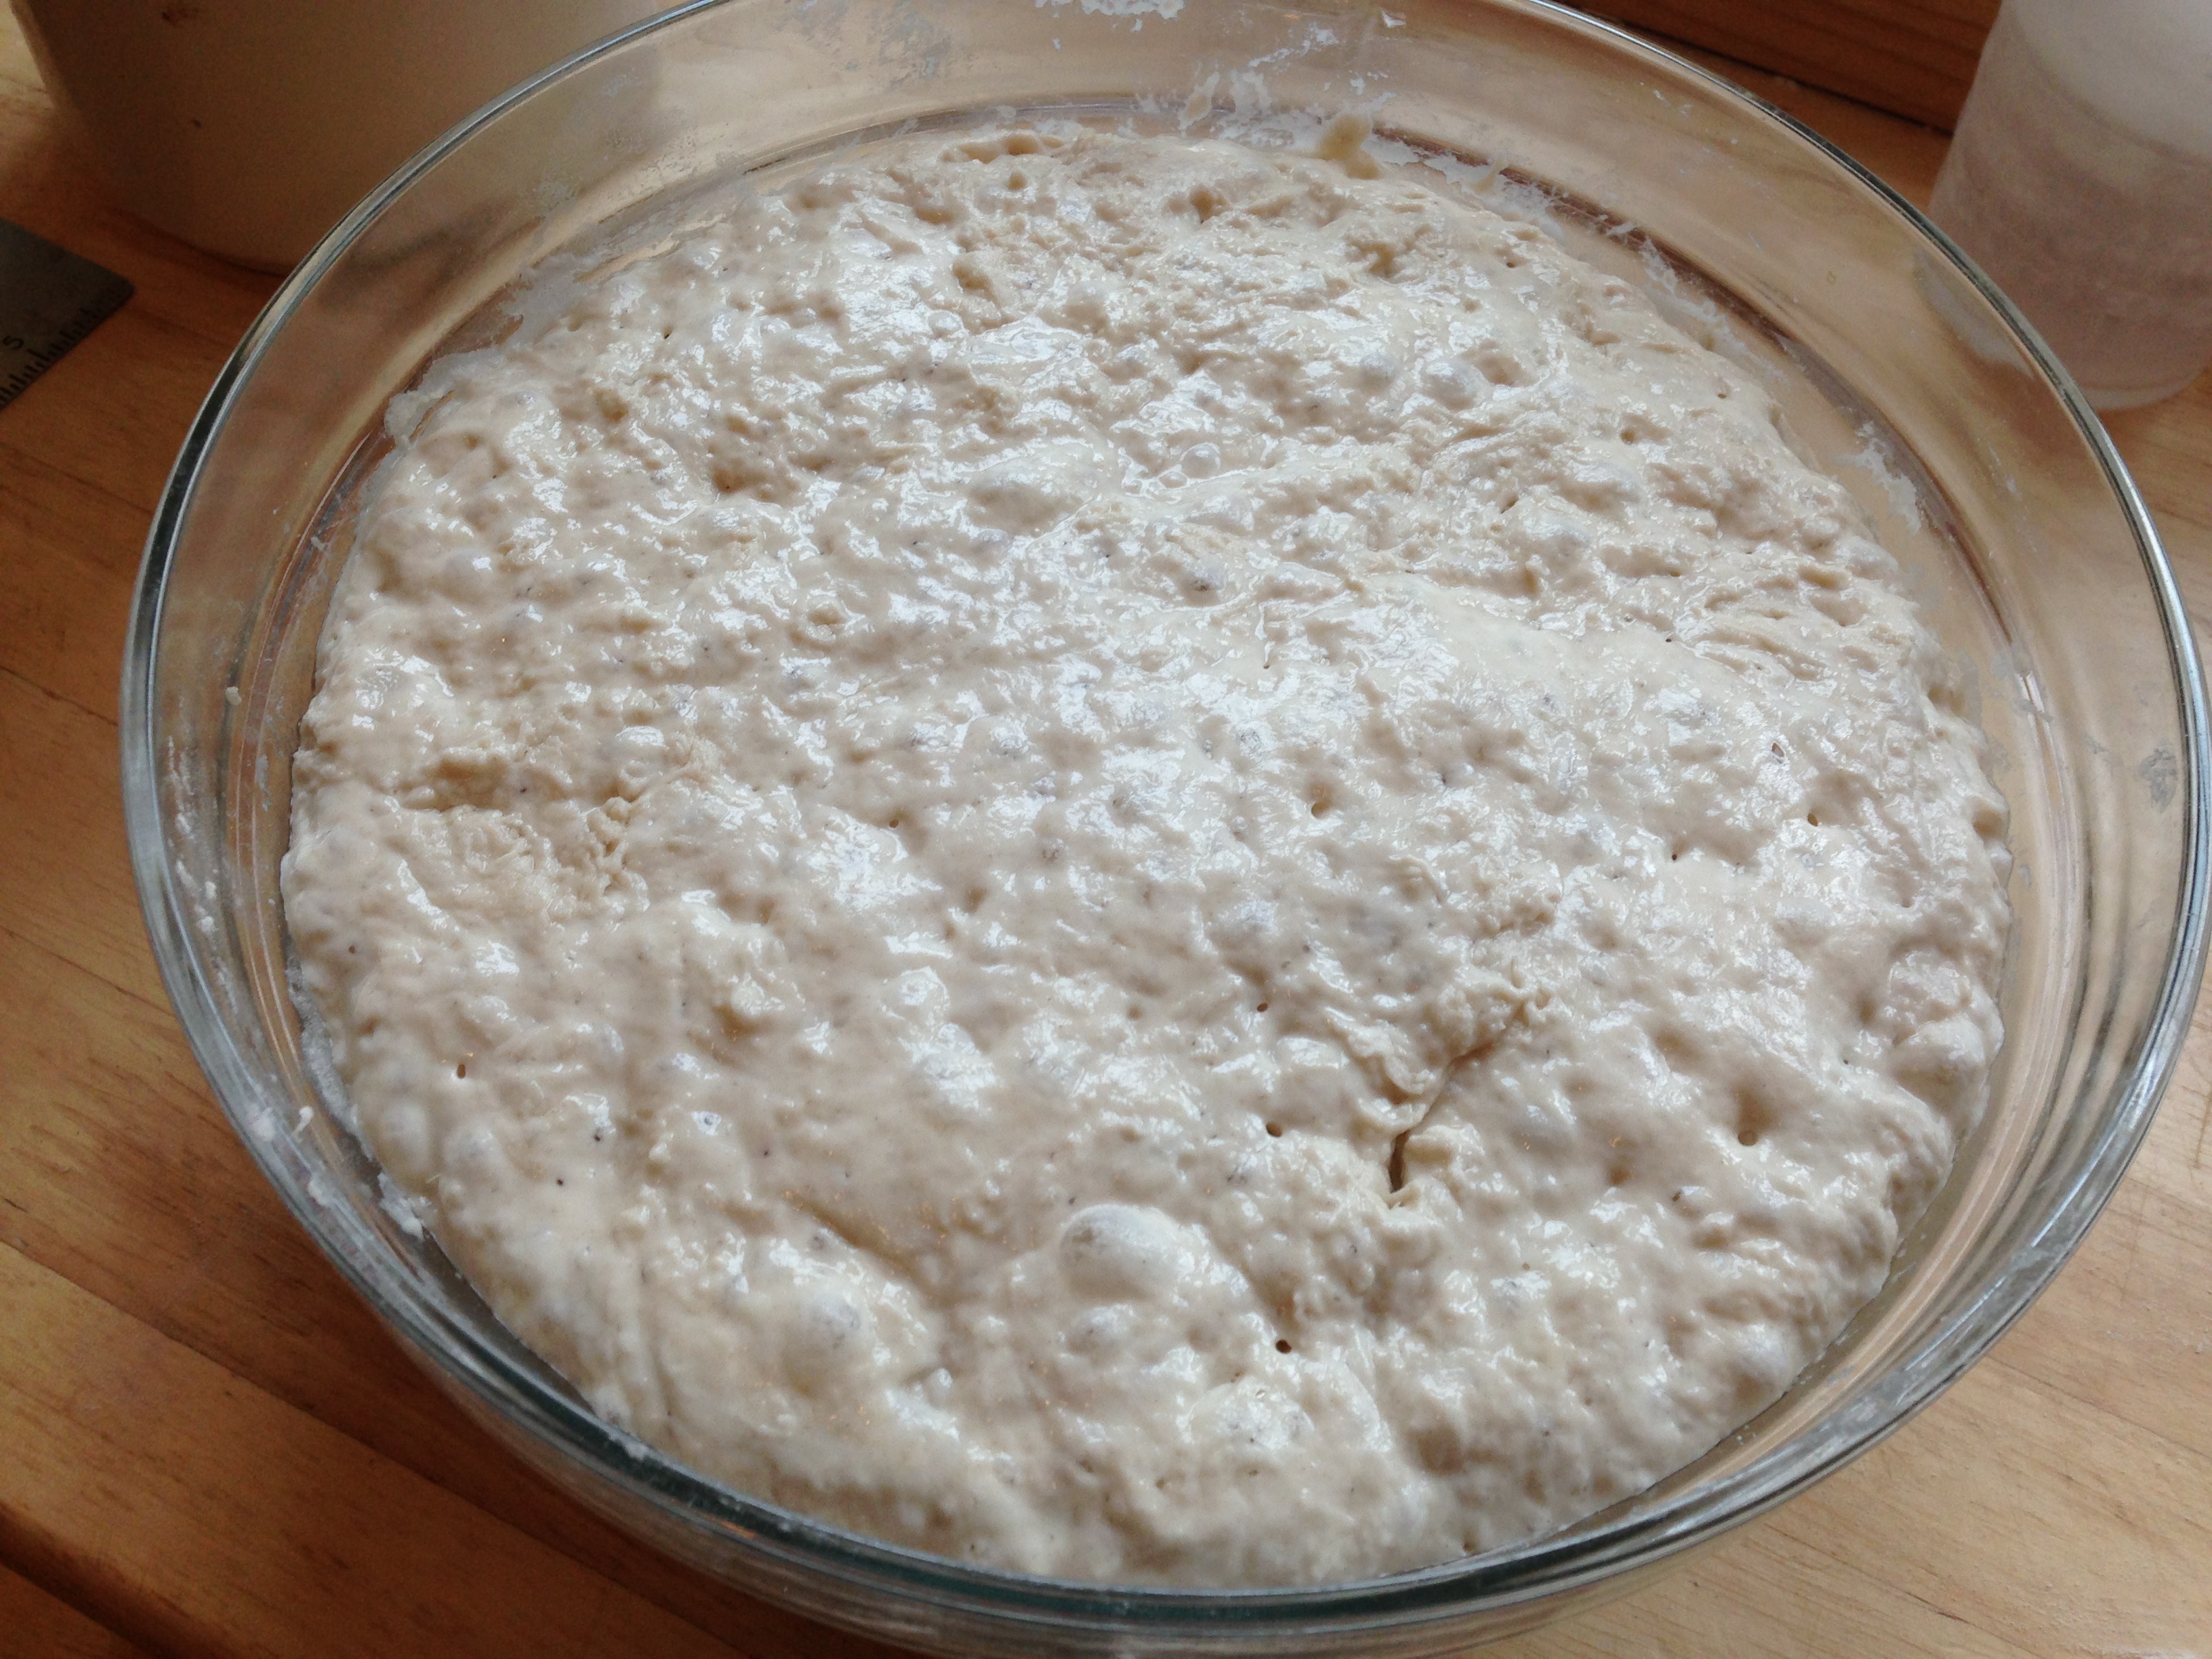
Step 2 for great pizza – great dough. I have tried many doughs, including whole wheat ones. For authentic pizza – this Jim Lahey dough is the best. It takes a long time to make though, so be prepared. The idea behind this dough is that the tenderness and pocketed texture come from fermenting the dough (for 18 hours, I told you it takes time!), and then handling it as little as possible. That means no kneading!
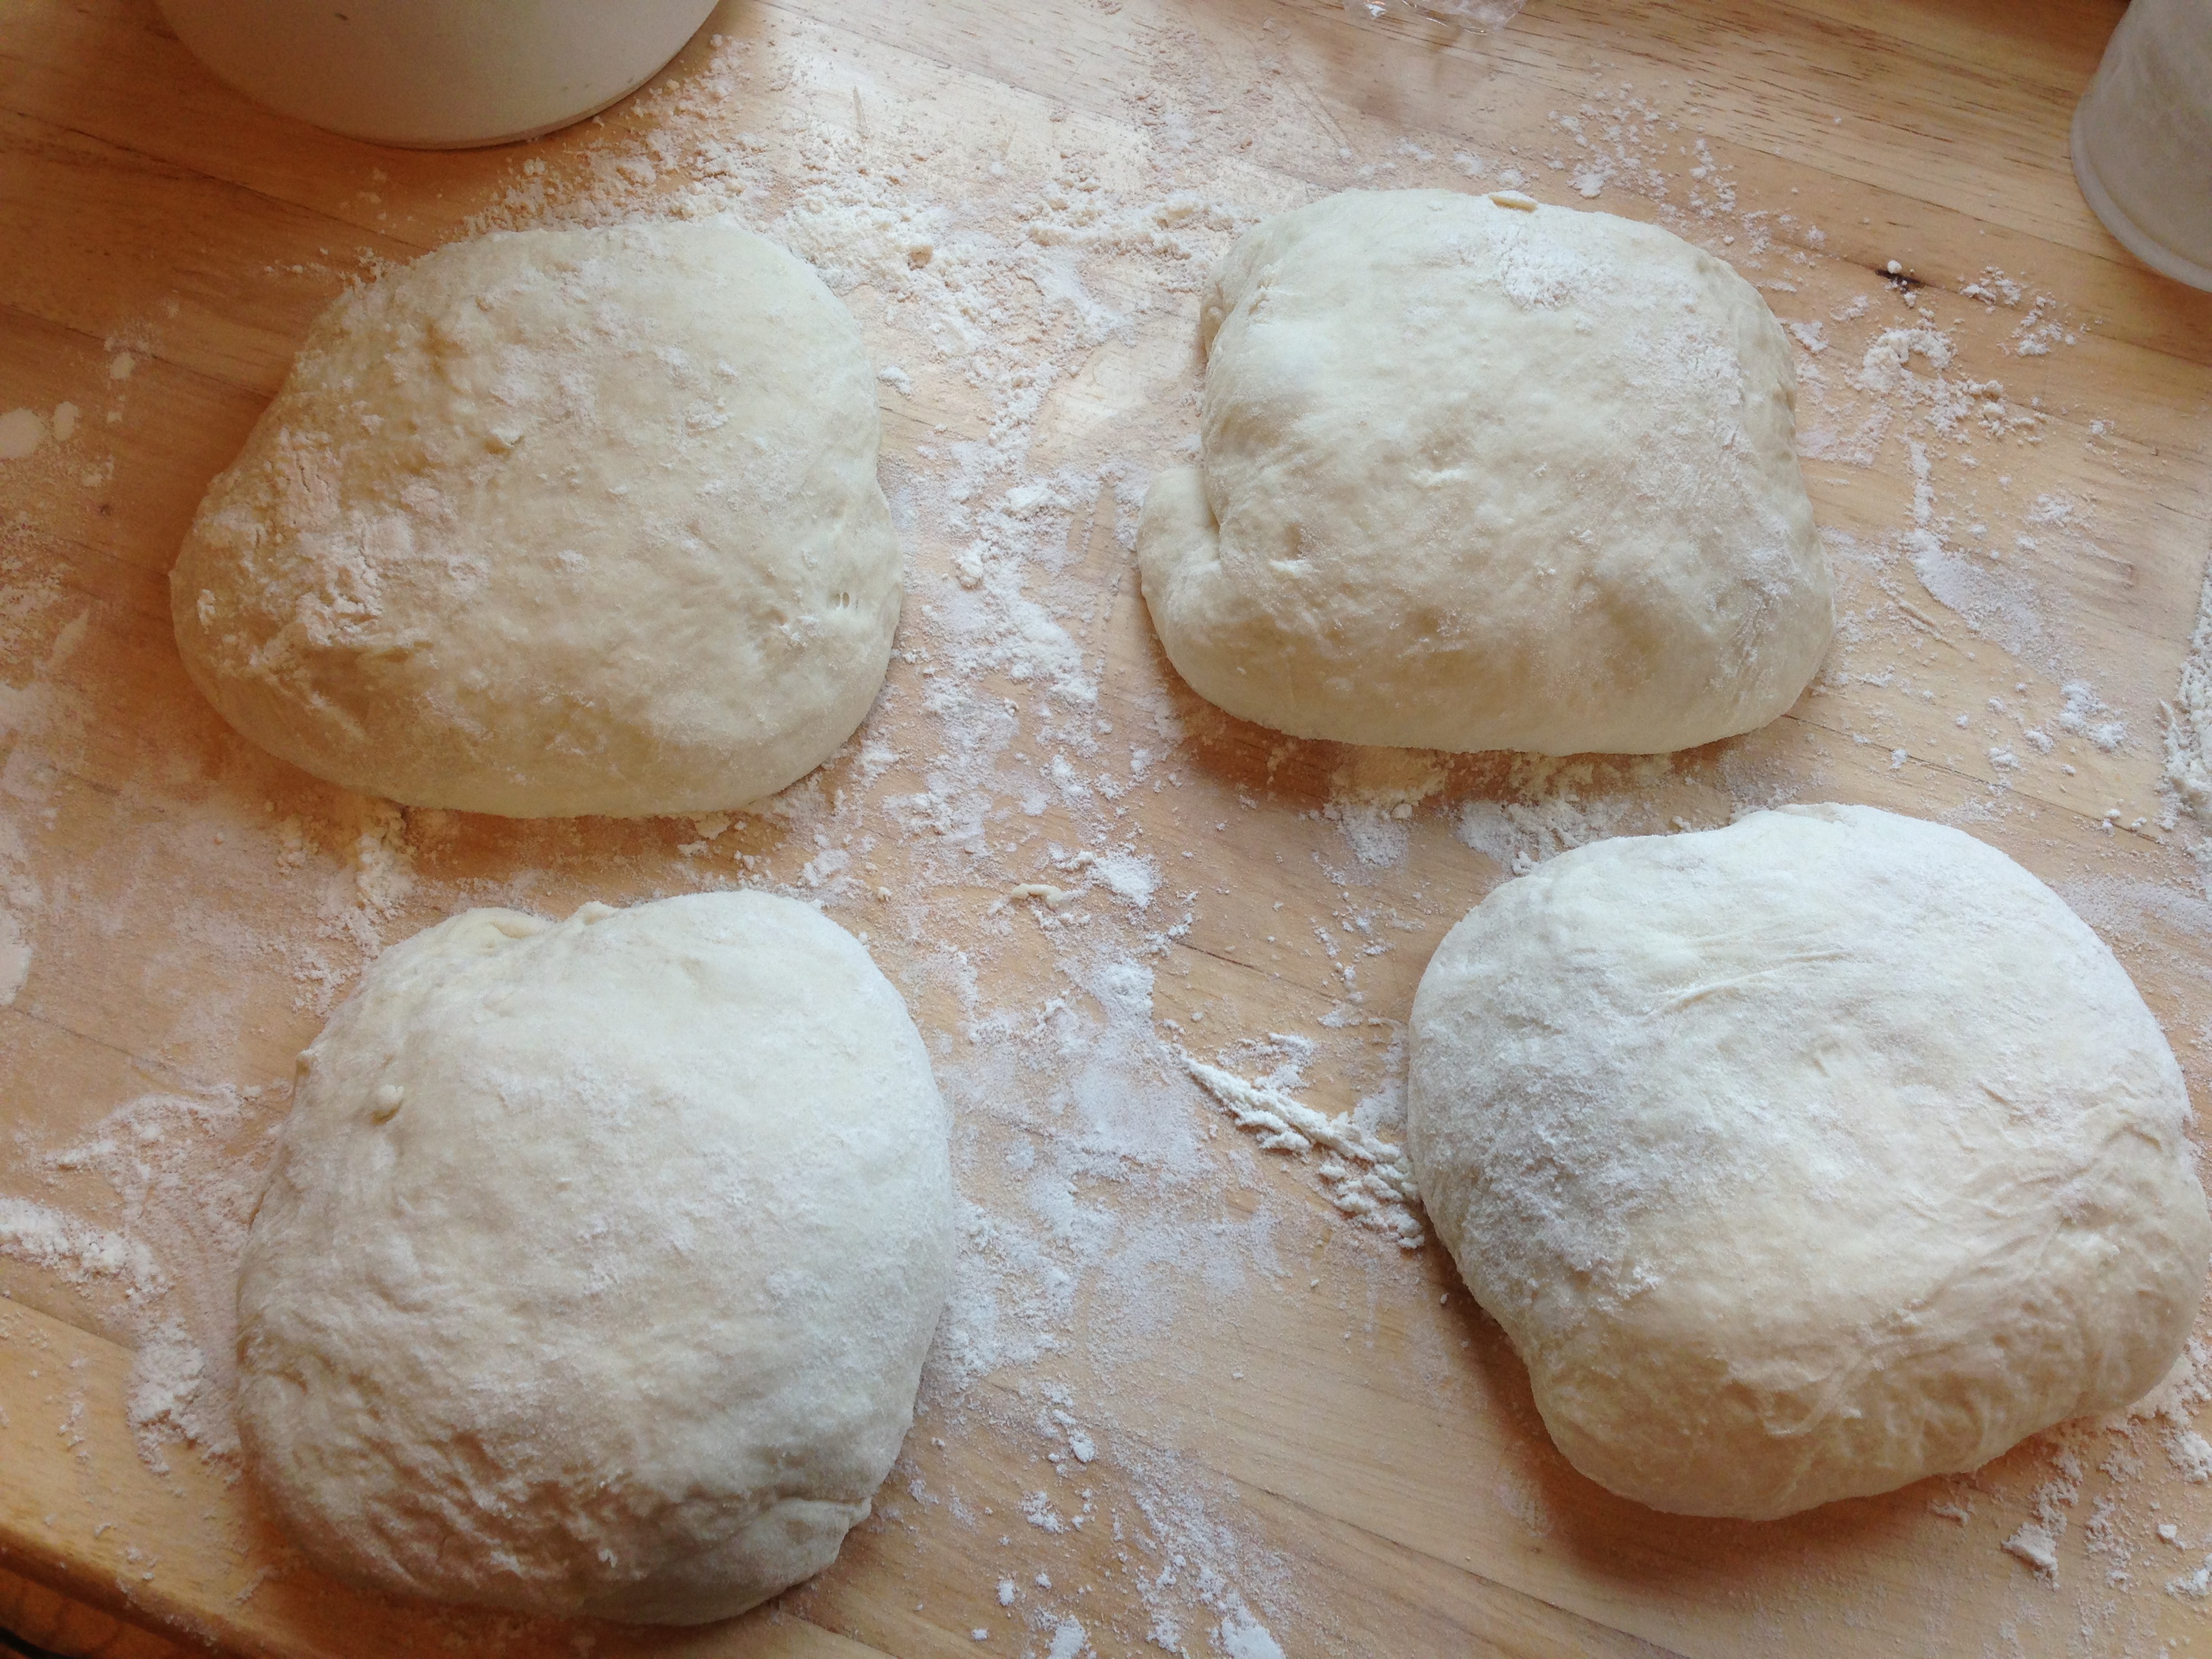
After letting the dough ferment (like sourdough starter), you carefully remove the dough from the bowl and place it on a floured surface. Then you separate it into four parts and gently fold (not roll, or knead) the parts into balls. Use them quickly or wrap tightly in plastic wrap and refrigerate. This dough is only good for a couple of days so plan to make a lot of pizza!
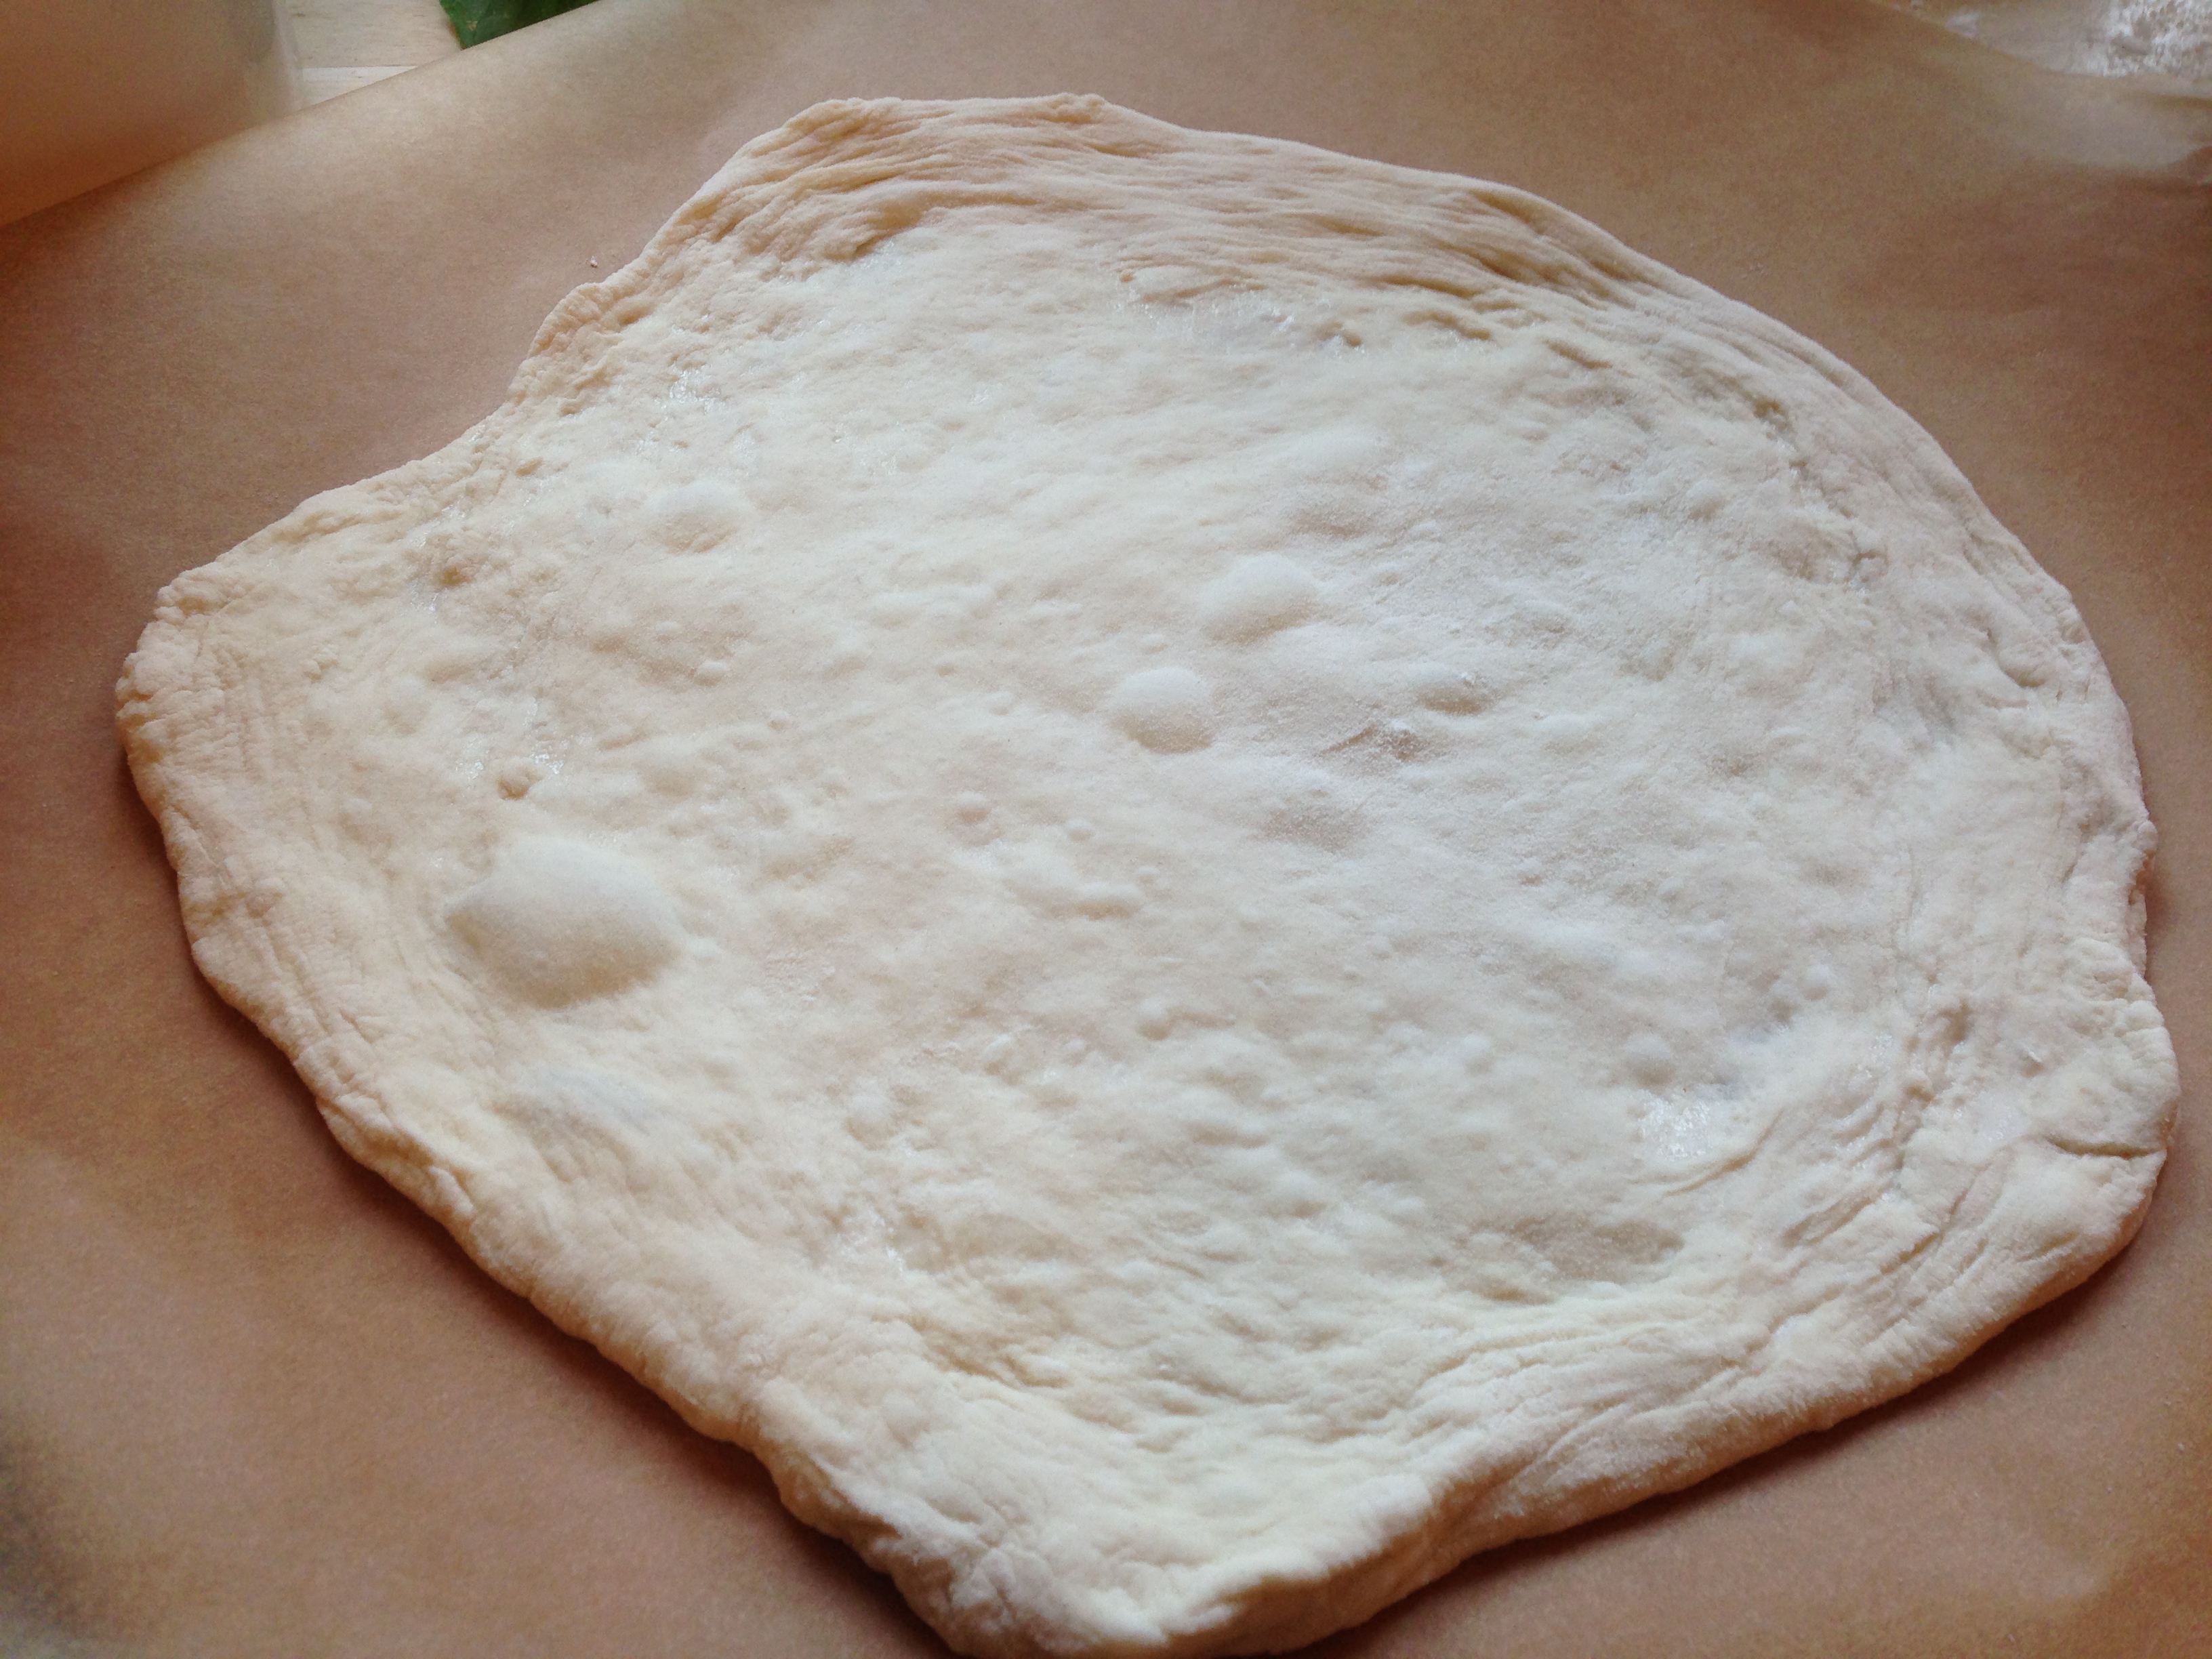
When you are ready to make the pizza (the oven and stone should be preheated at this point), carefully and gently stretch the dough. Either in the air on your knuckles, or on a floured surface. For some technique tips – check out this video. See those bubbles in the dough, there? That’s what you are trying to achieve. Those will blister up and make your pizza awesome. Here’s another handy trick – I always have trouble getting my pizza off the peel, no matter how much cornmeal I put on there. So I have started putting the pizza onto parchment paper and sliding that onto the stone. Then after about 2 minutes (you will smell it starting to char), I slide the parchment out from under the partially set dough – easy!
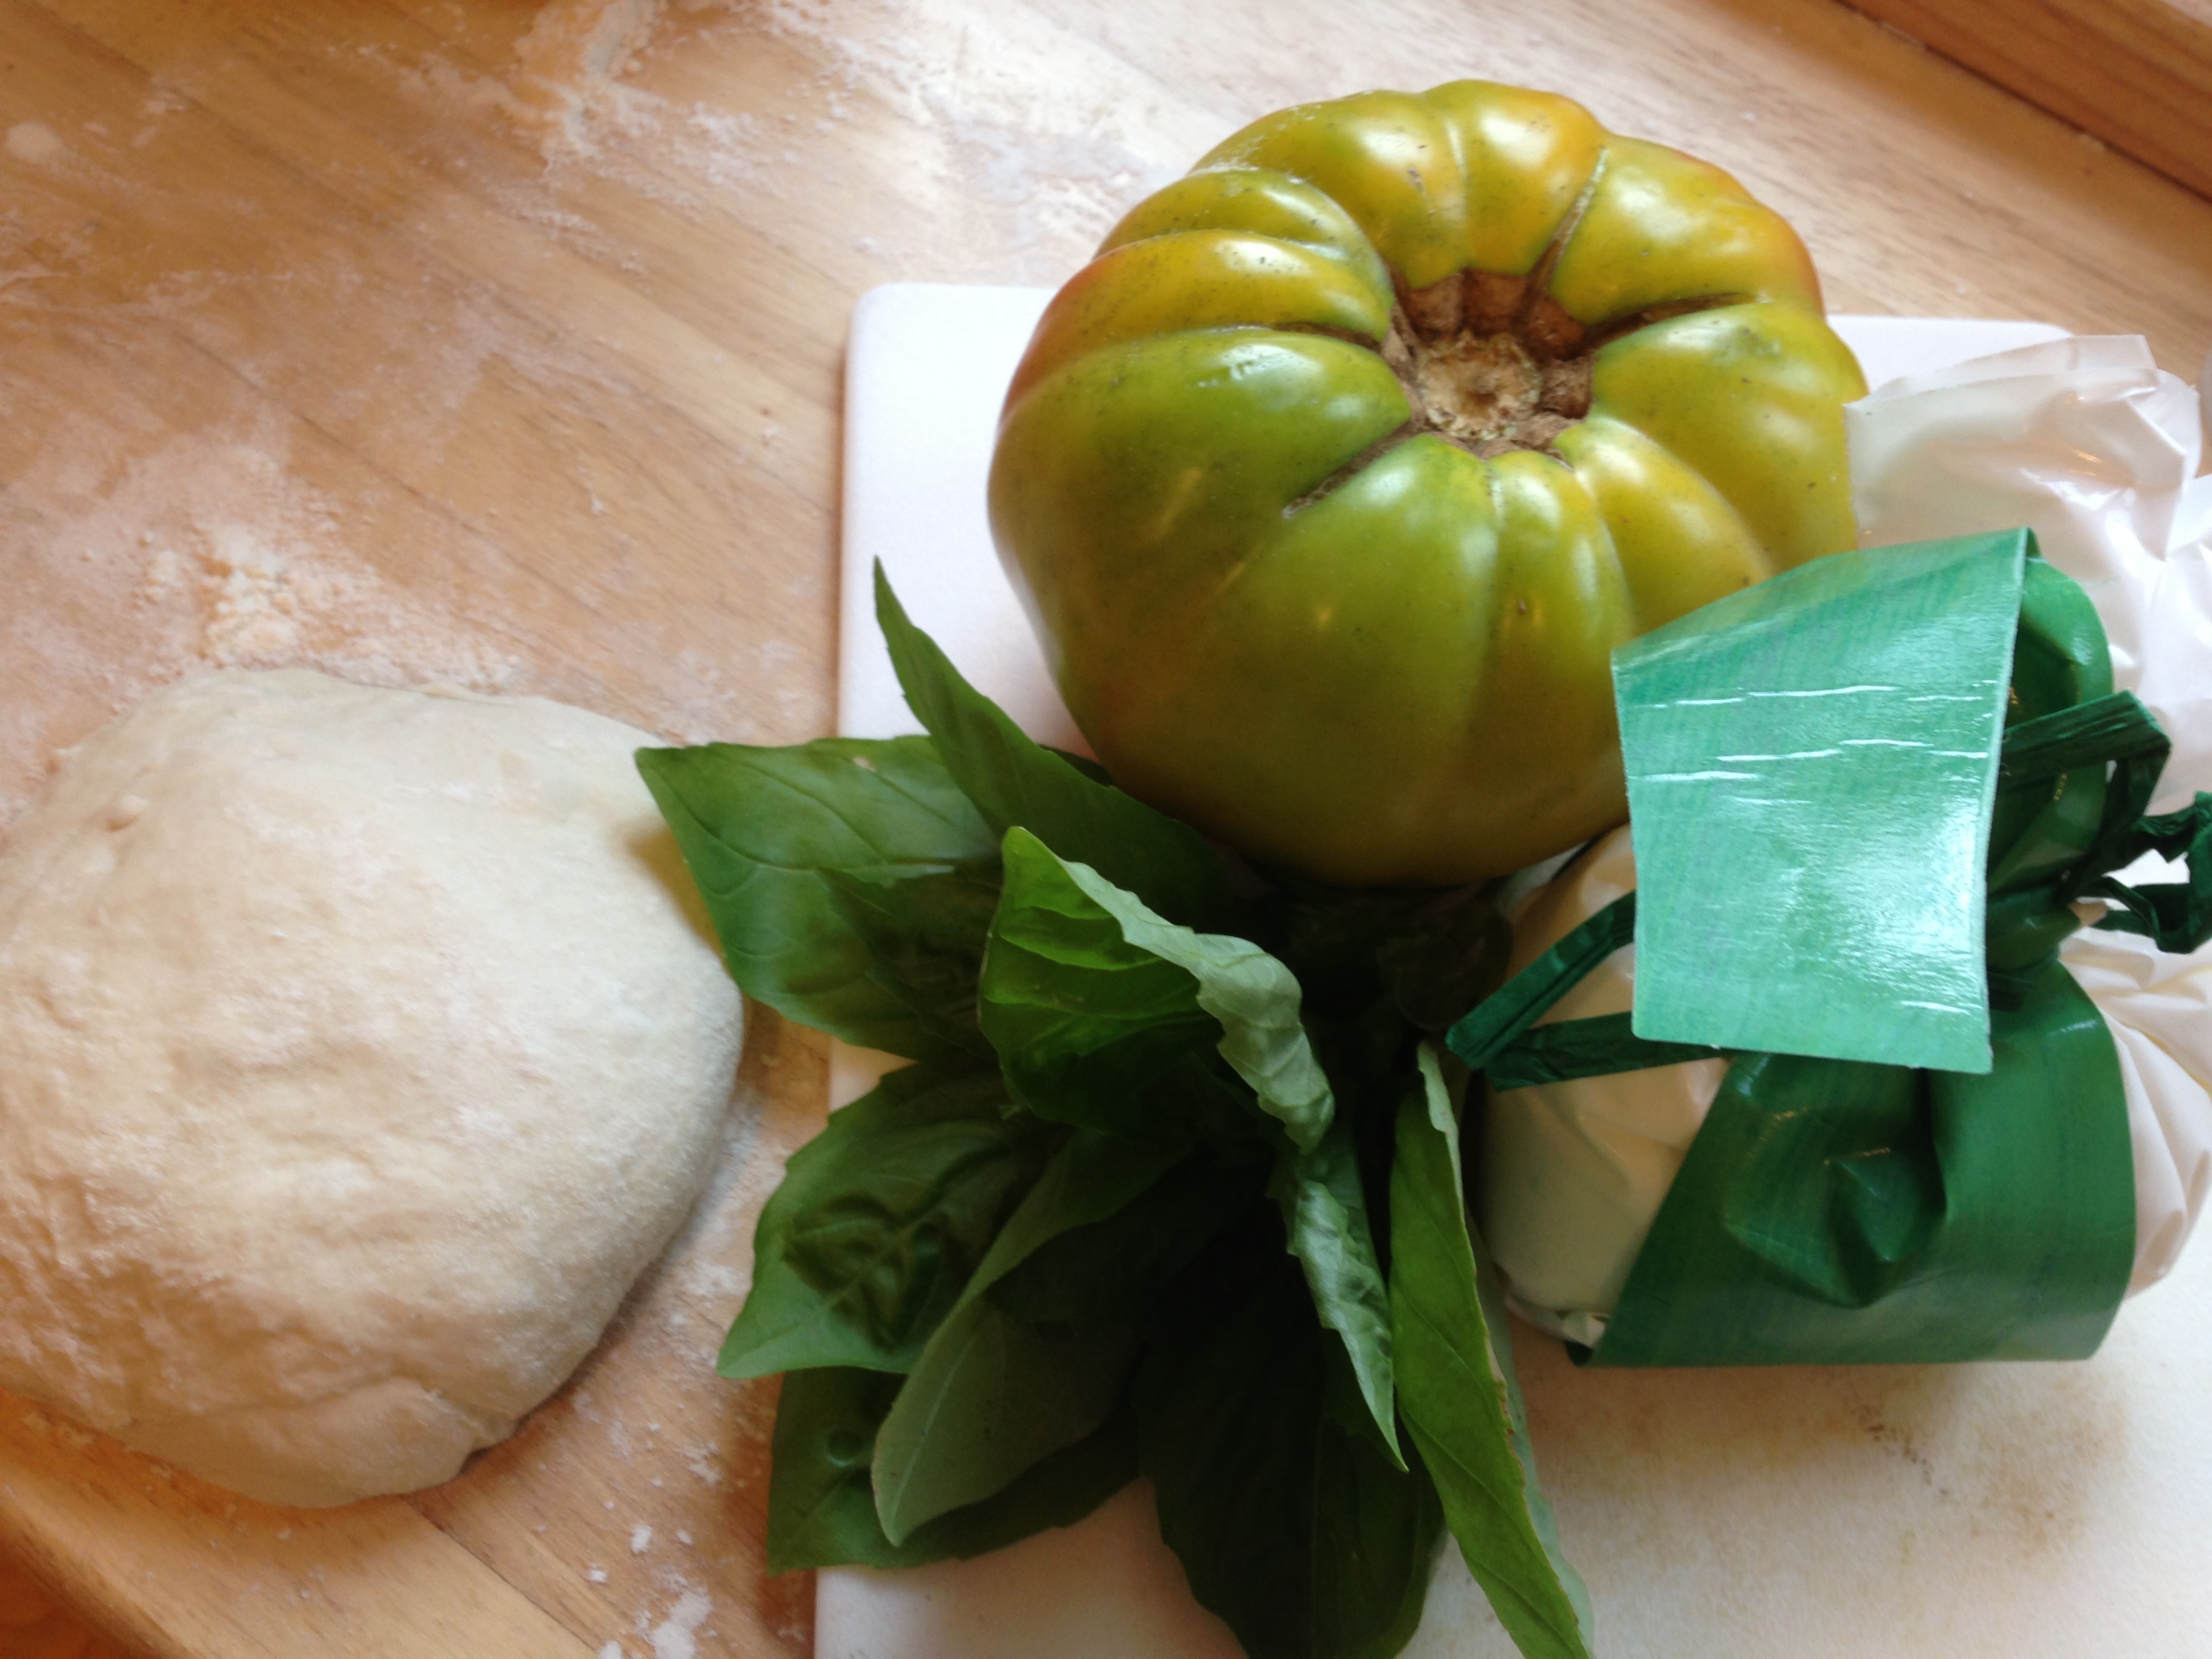
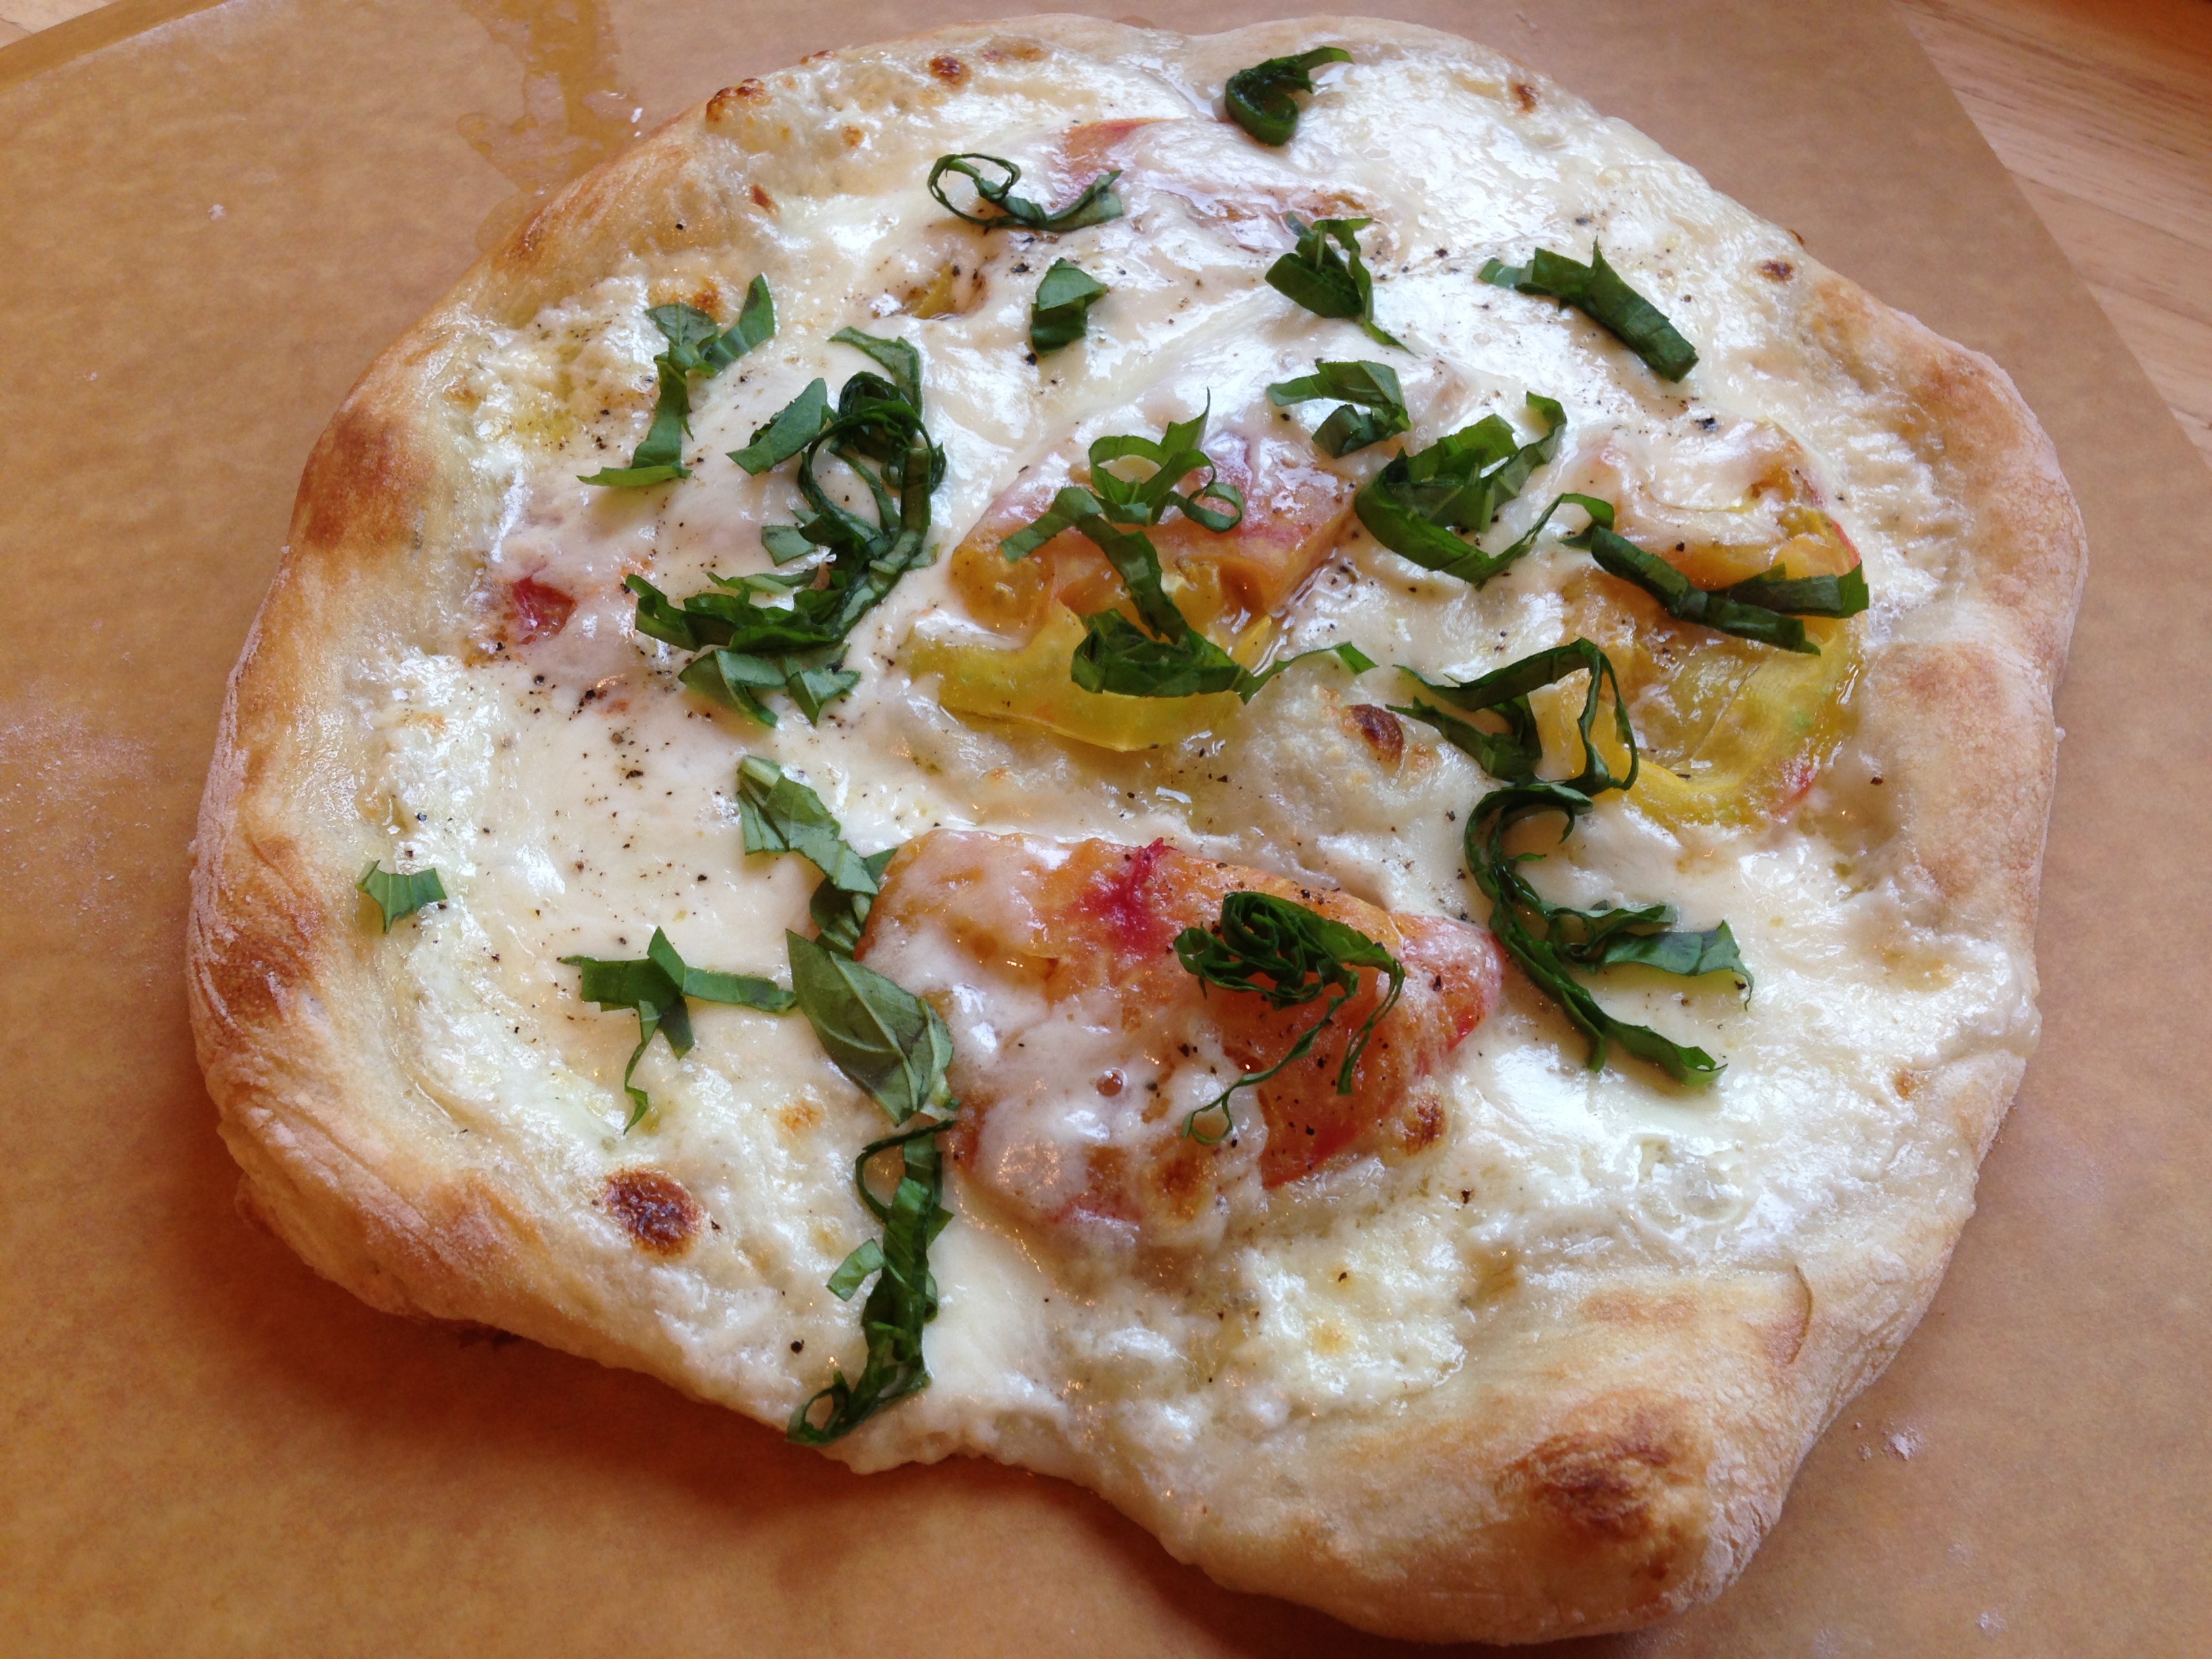
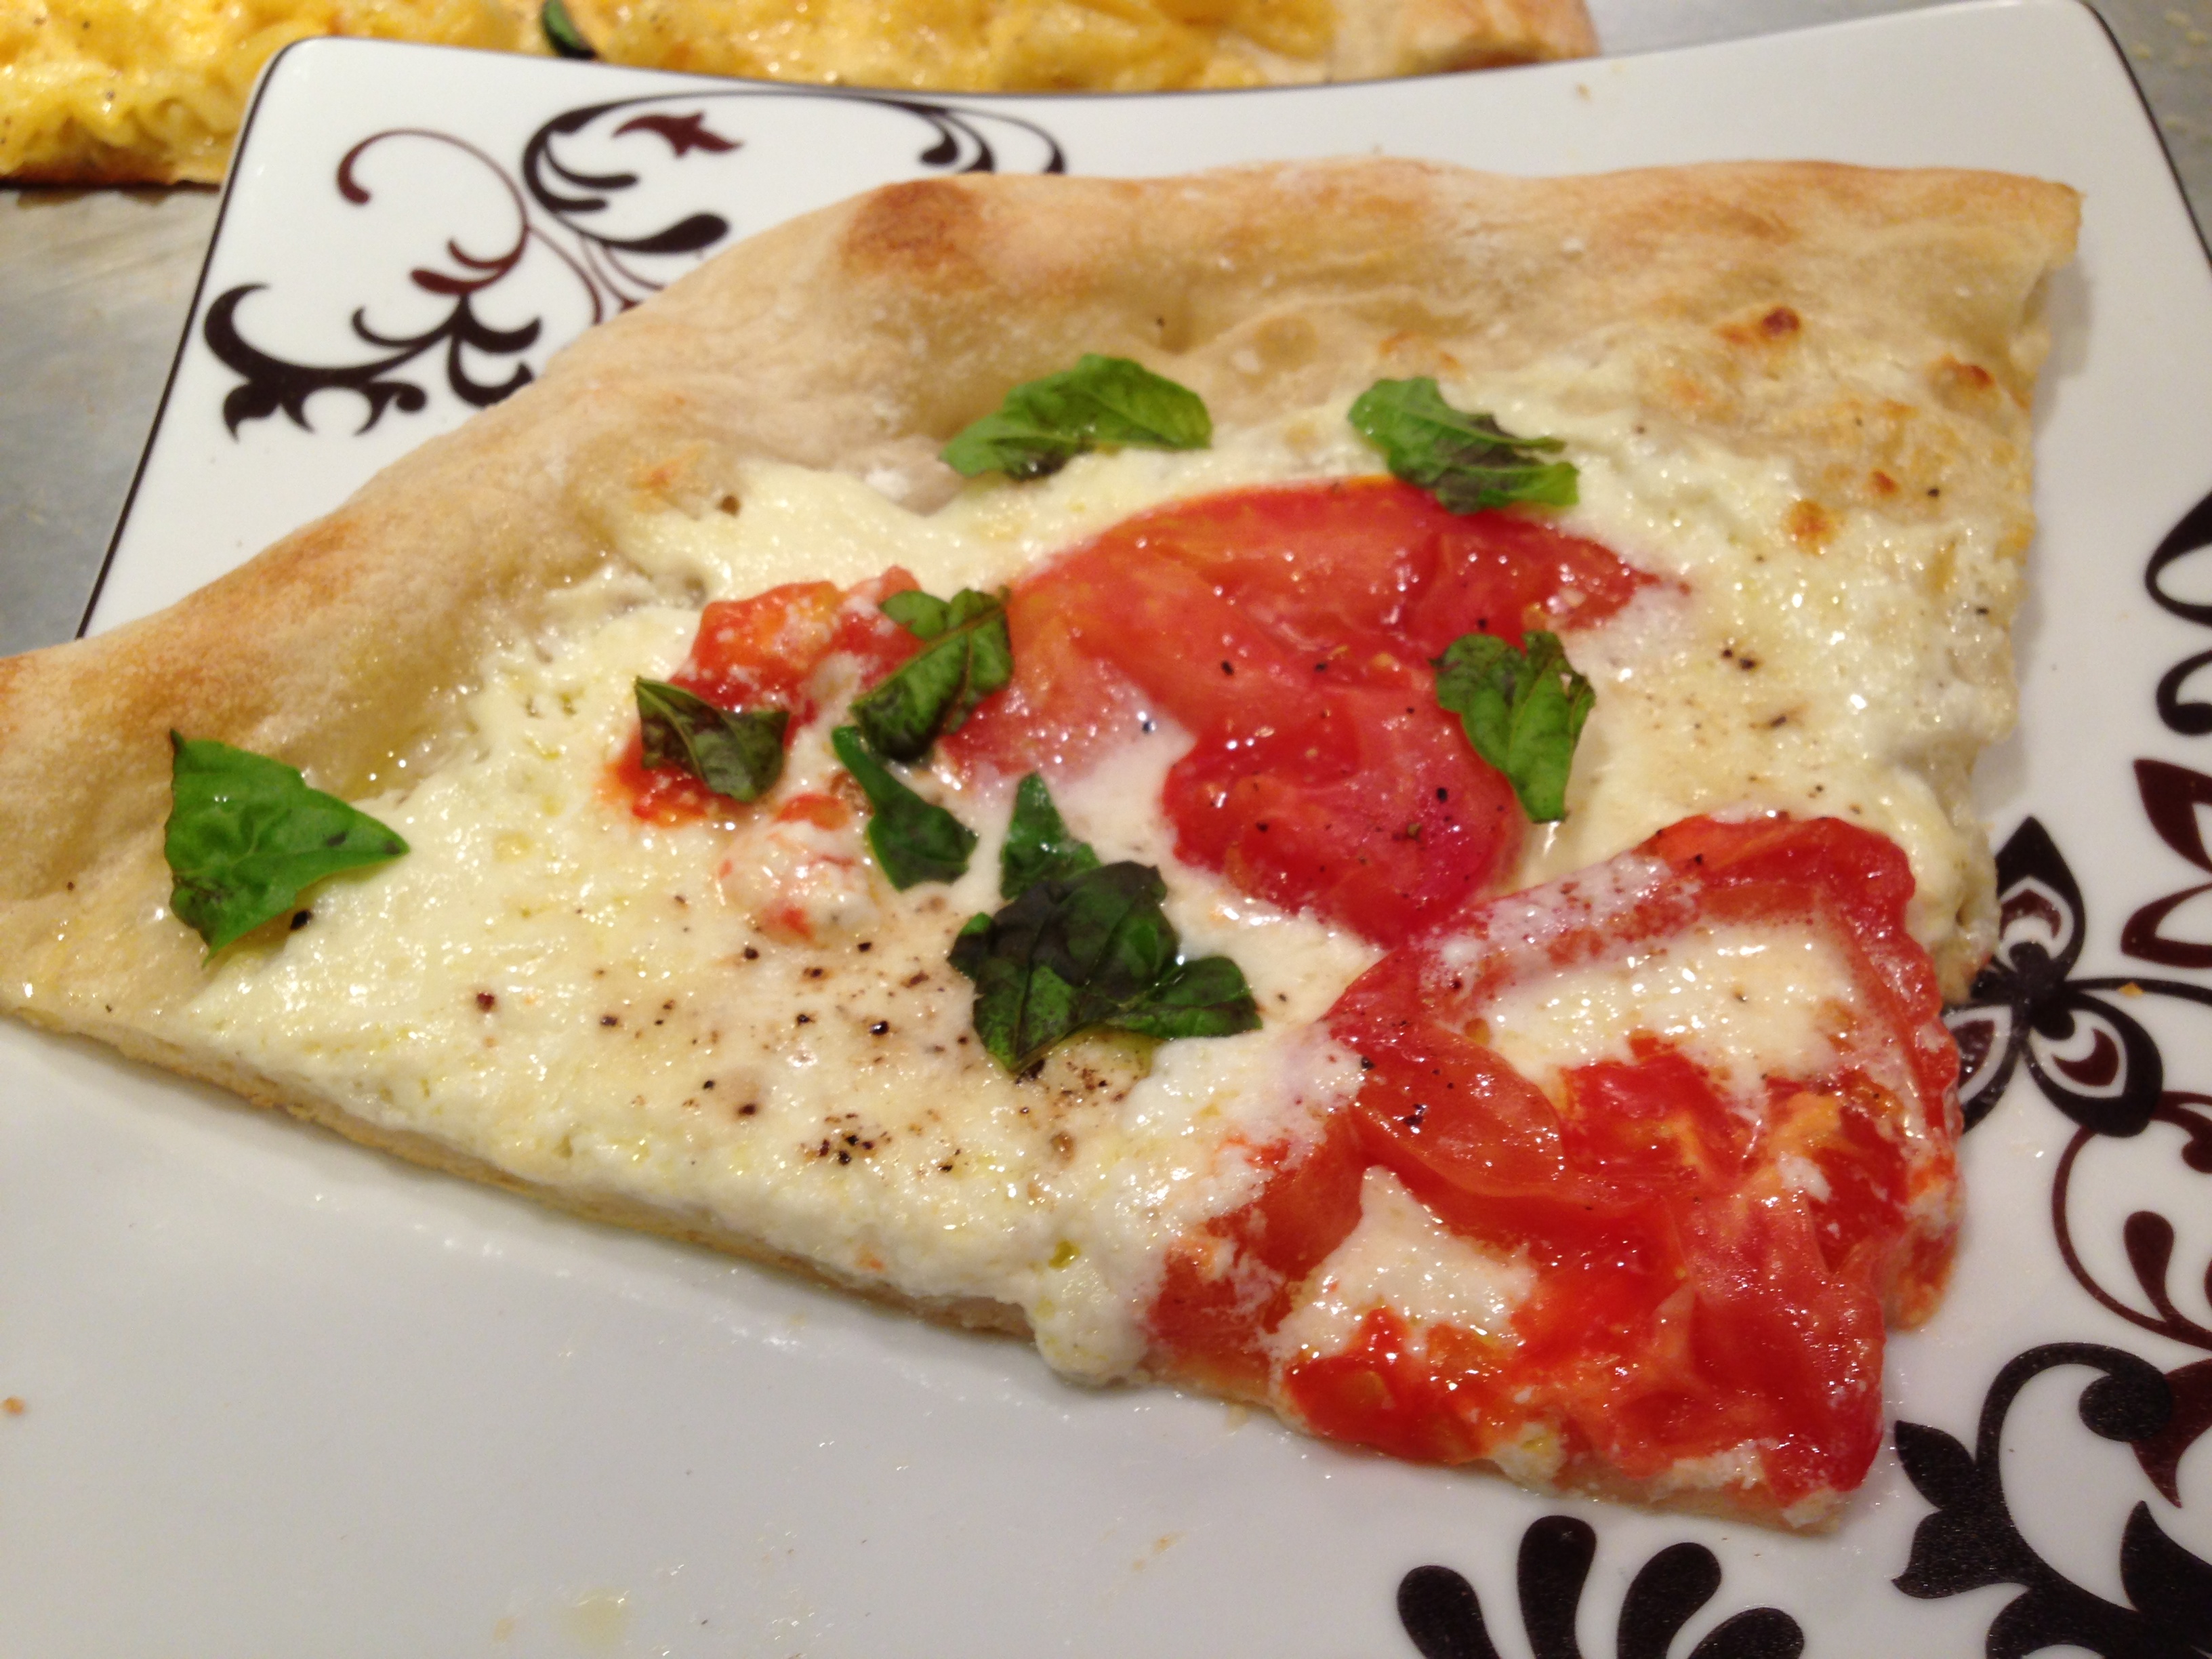
So what kinds of things do I top my pizza with? I’m glad you asked! My favorite pizza is margherita, which is delicious when made with fresh Buffalo mozzarella. Even better – using cream filled burrata! Also – check out that GORGEOUS heirloom tomato.
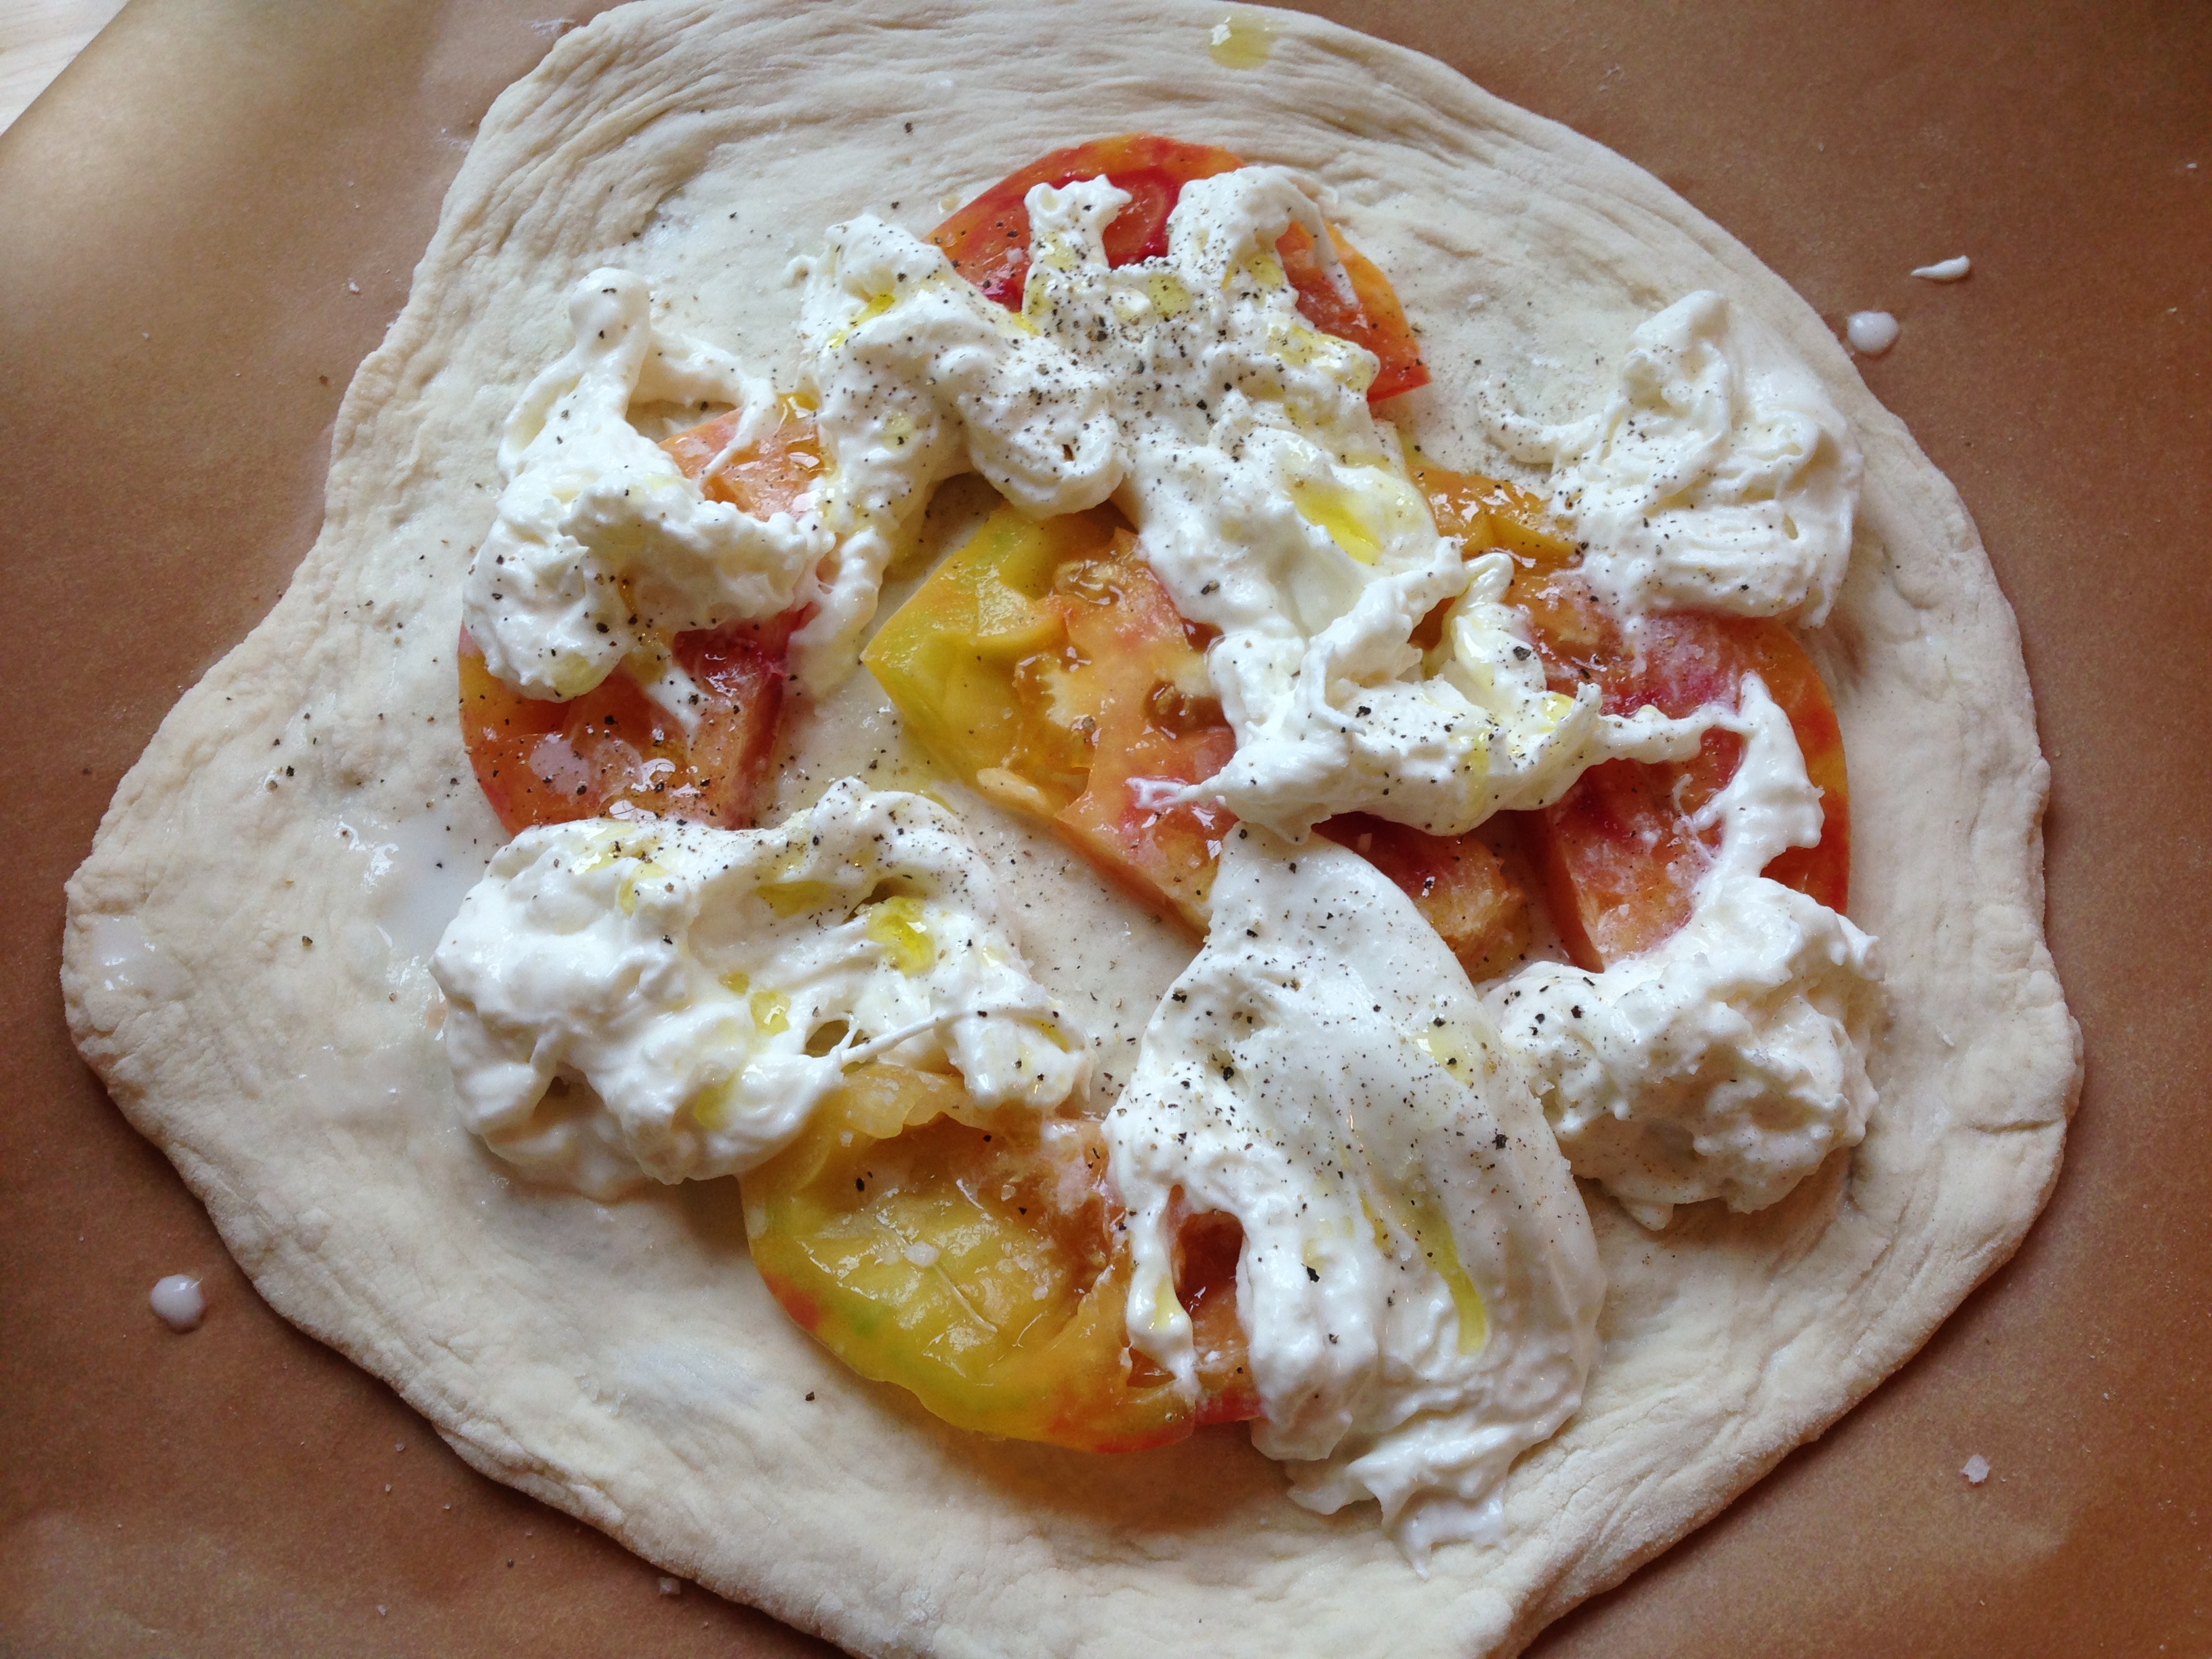
Here is the part I struggle with most – not putting too much on the pizza. See that photo – that looks like a decent amount of cheese, right? Wrong! That was too much and I almost had an overflow problem! You have to be very restrained with toppings on these pizzas, which is tough. I used half a large tomato, 3/4 of the burrata (should have used less), sea salt, black pepper, olive oil, finished with basil.
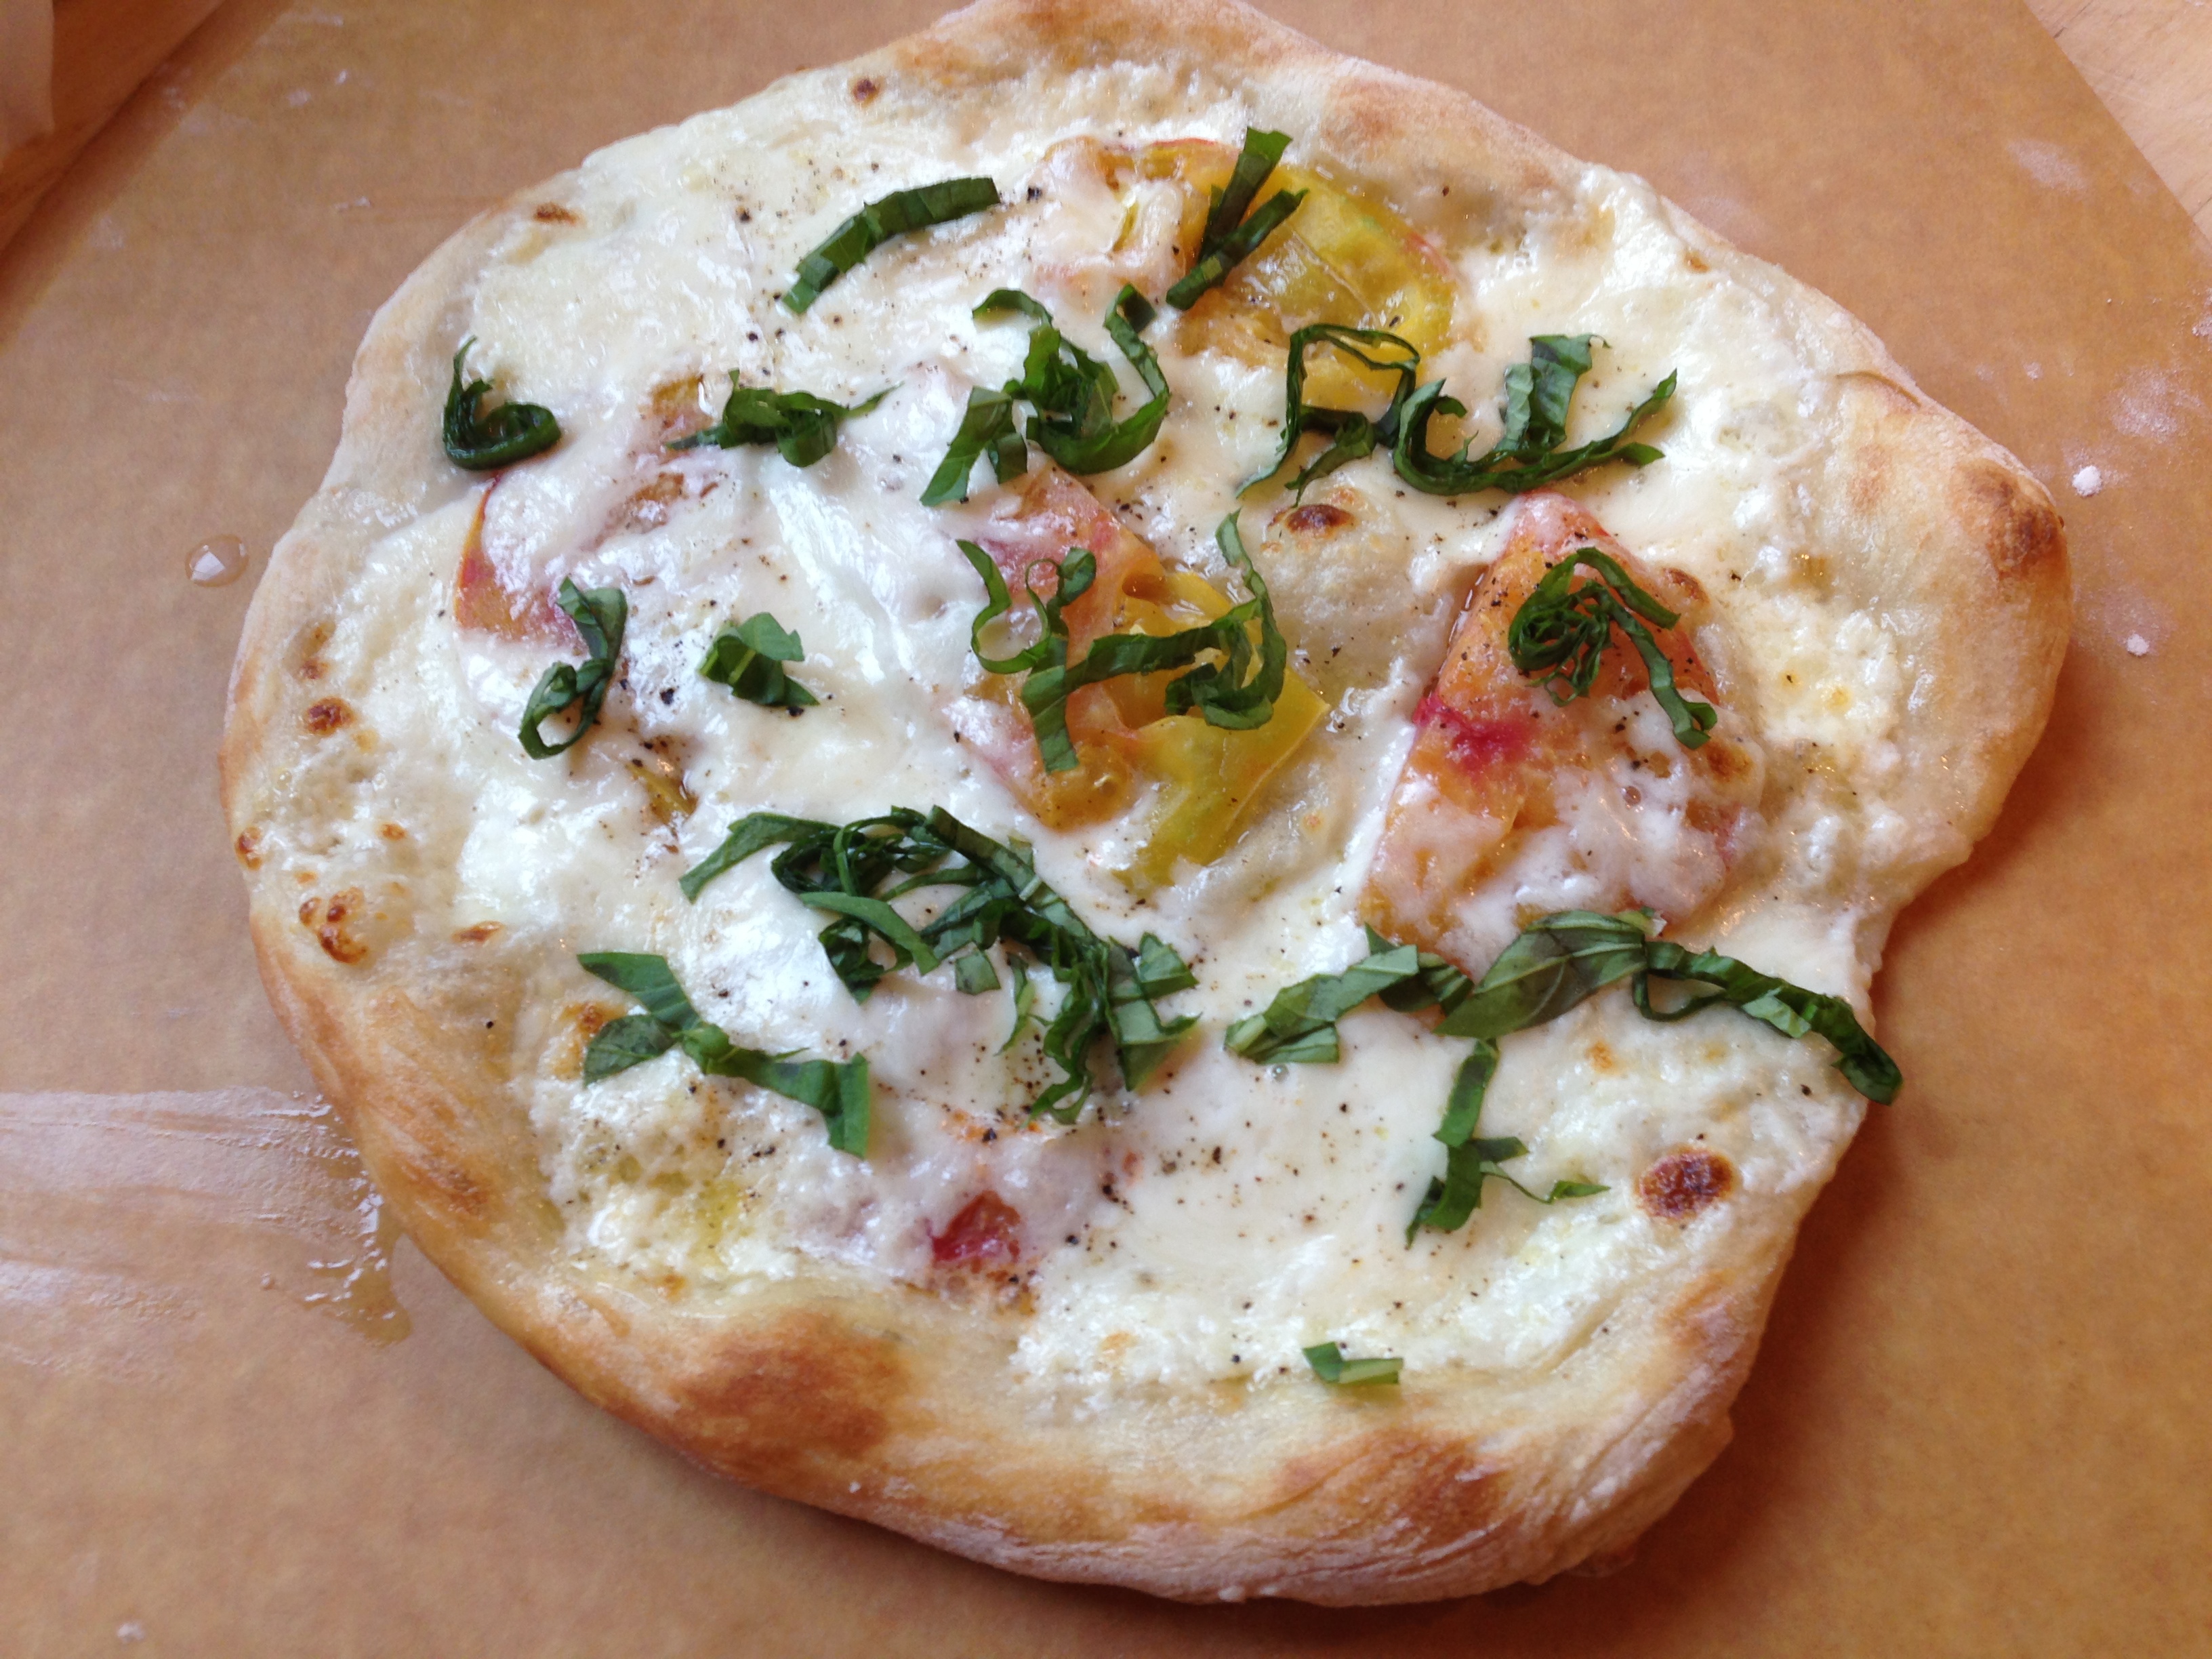
Some people put the basil on before it goes into the oven; I like to put it on after to keep it vibrant.
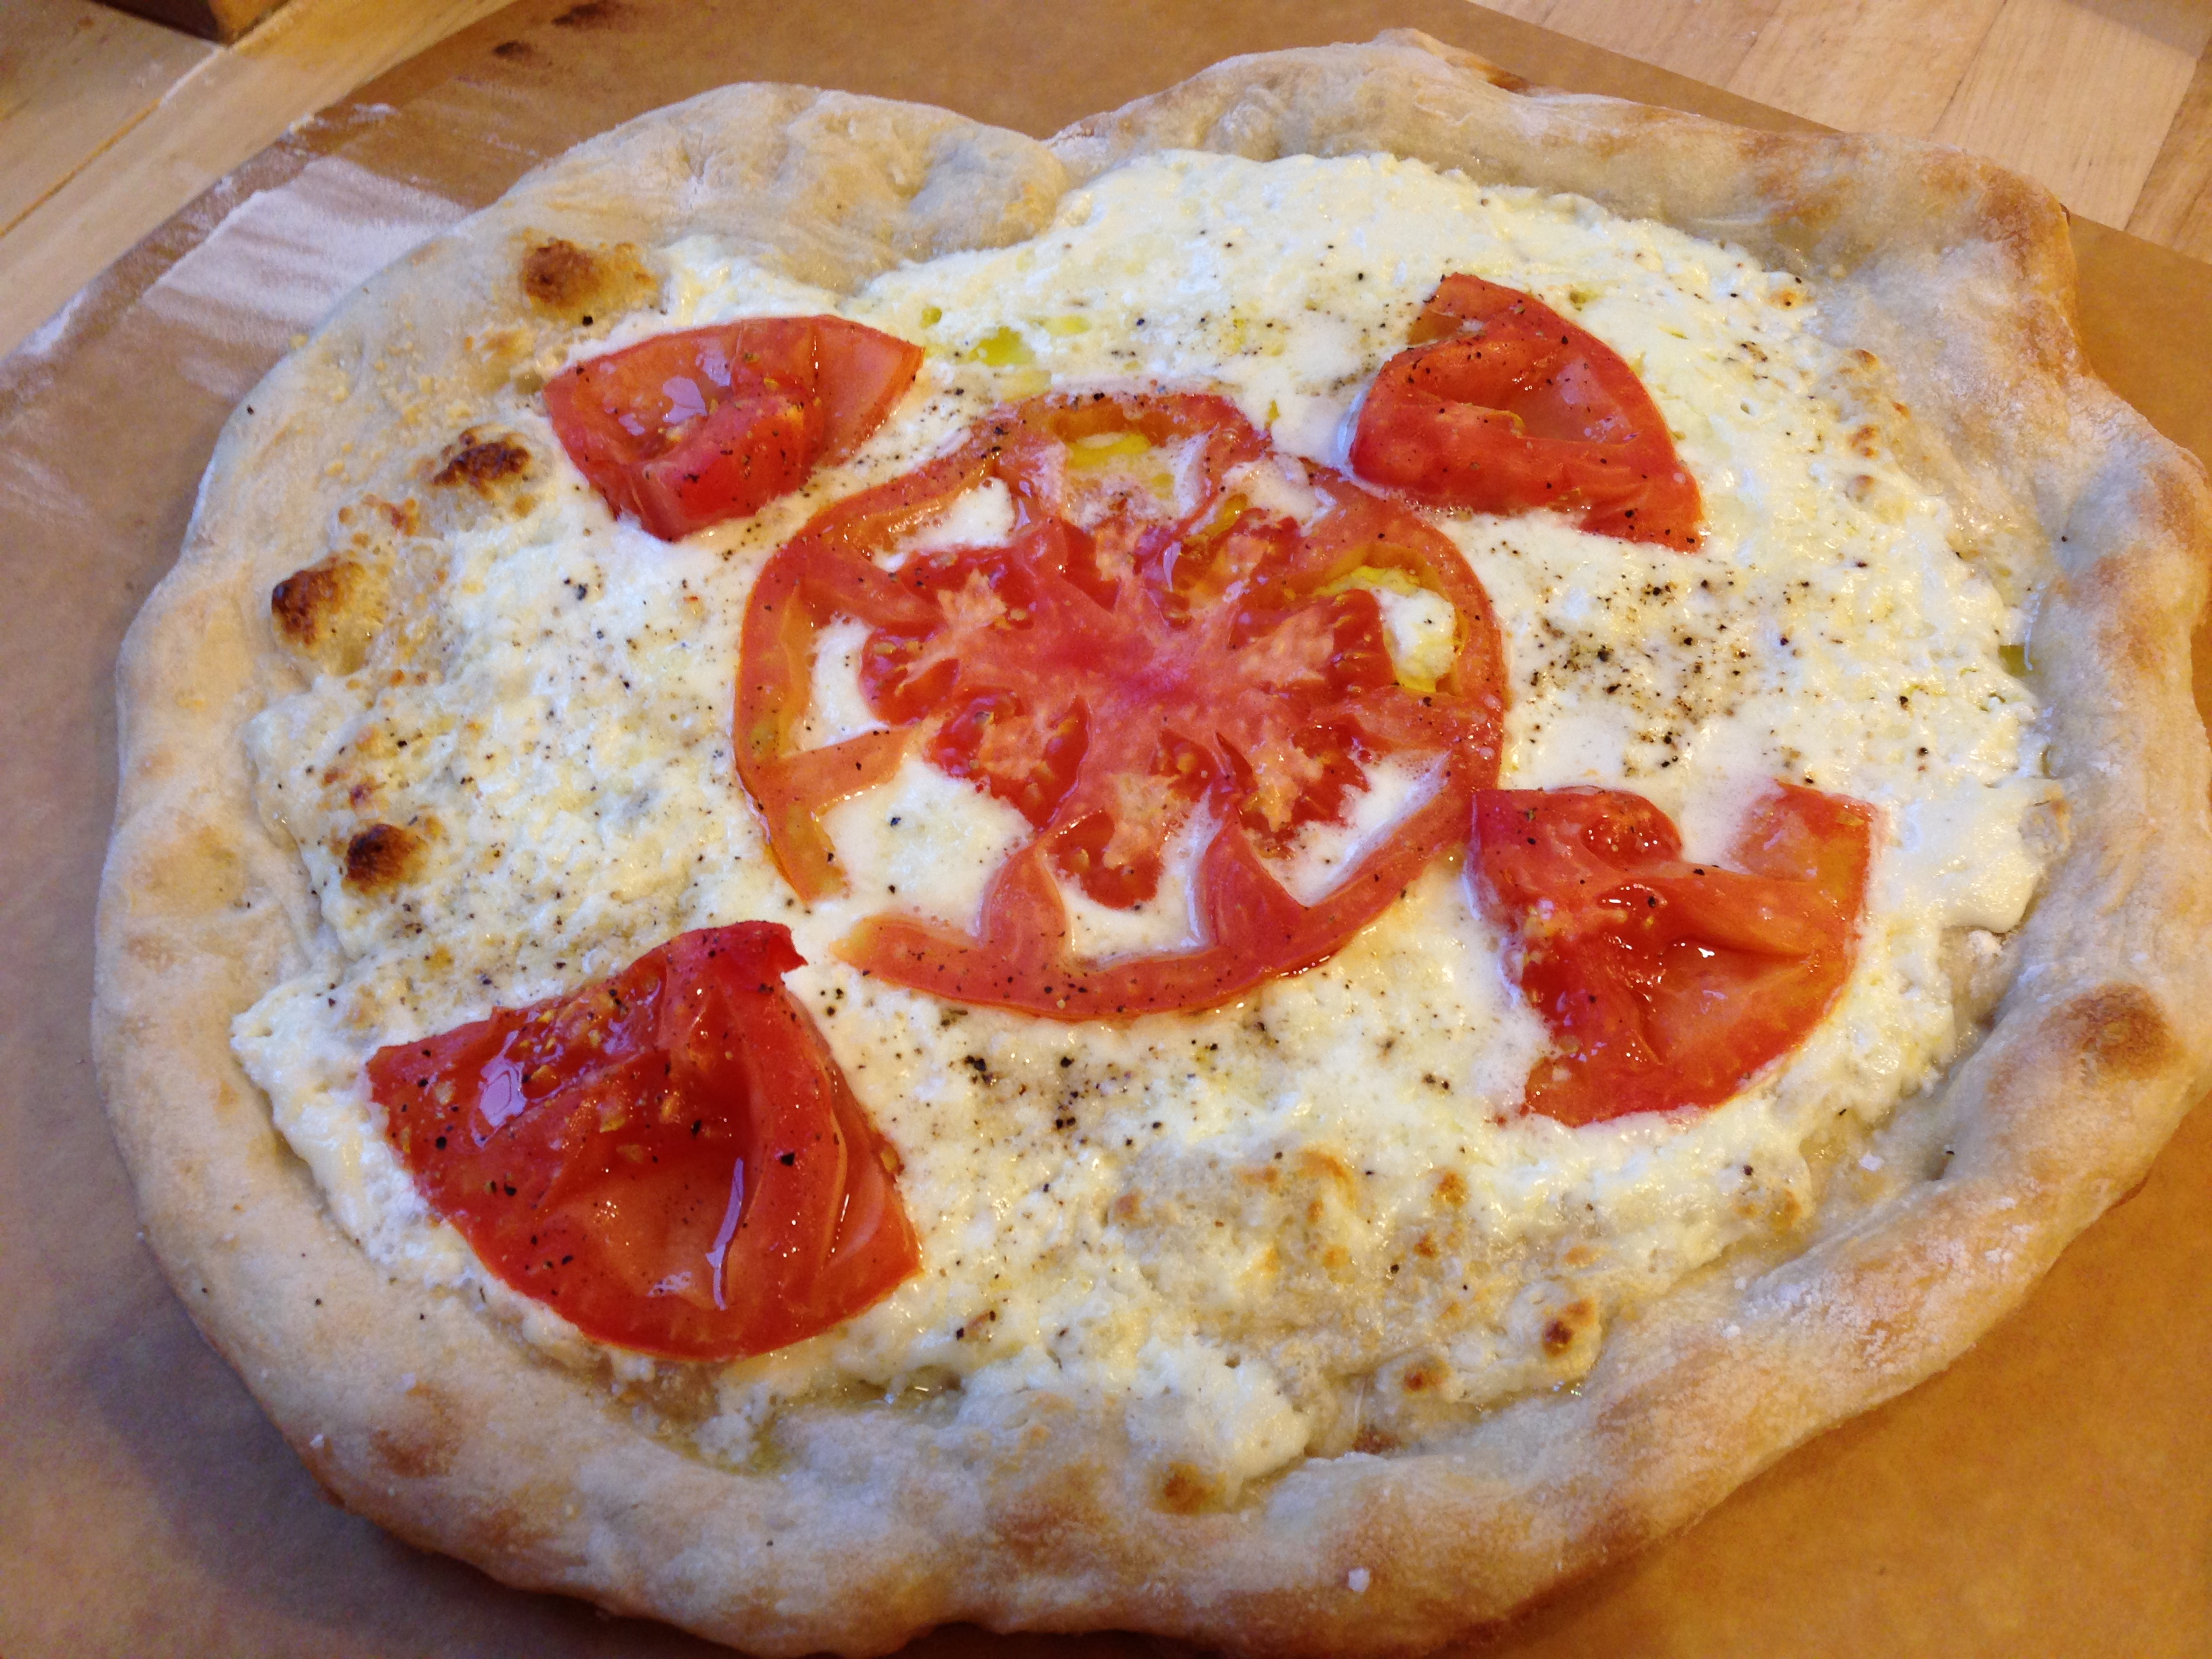
A similar pizza swapping ricotta and Parmesan for mozzarella is also delicious. I used about a cup of ricotta and 1/4 cup of Parmesan, 1/2 a tomato, sea salt, black pepper, olive oil, finished with basil.
Again, I like to add the basil on afterwards. I also used too much cheese on this one, I’ve really got to work on that!
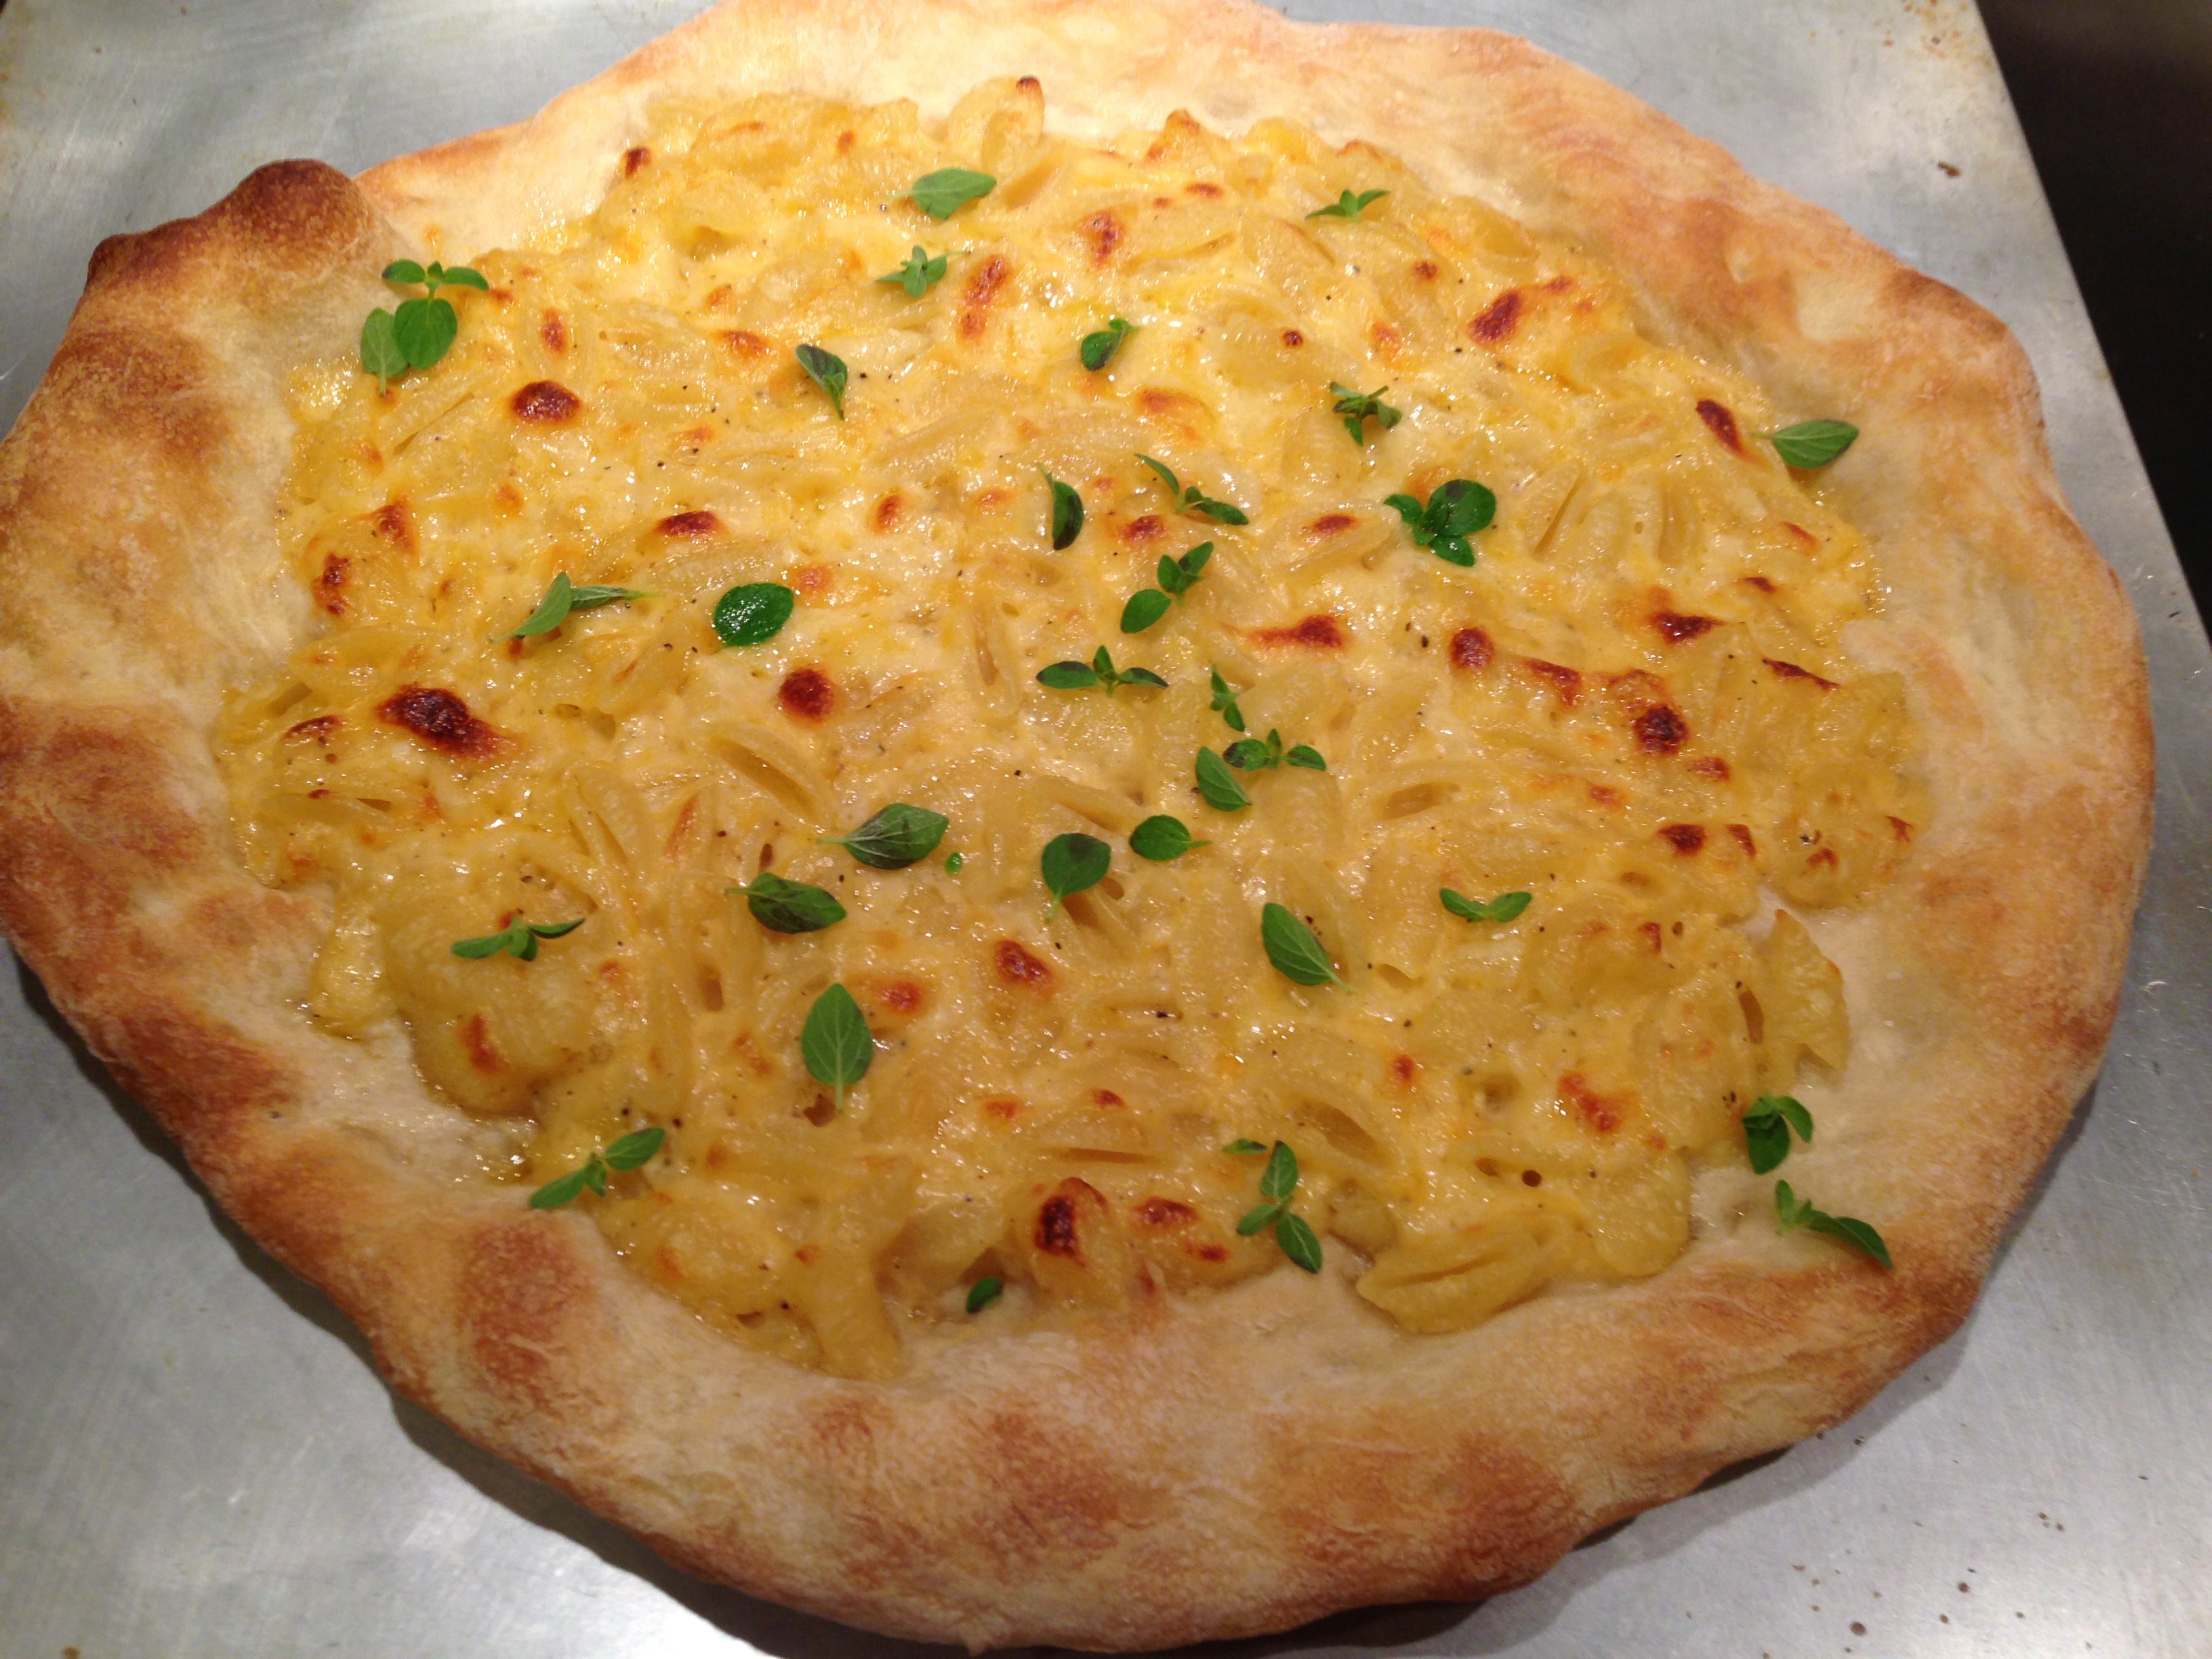
Lastly, I have a bit of an unusual one – Mac and Cheese pizza! What?! This came about when I asked Jasper what kind of topping he wanted on his pizza – he said mac and cheese. I thought he was joking at first, but when he told me he thought it would be interesting I figured I could make it happen. I made a homemade stovetop mac with cheddar, swiss, and mozzarella; then piled it onto the dough and baked it. Of course, this is a ridiculous amount of carbs – but it is fun!
For the mac and cheese – I cooked about 1 cup of mini shells to al dente. Meanwhile, I made a bechamel with 1 tbsp each butter and flour and 1 cup milk. I seasoned with salt, pepper, nutmeg, and dried oregano, then added a handful each of the three cheeses to the sauce and the shells. After baking the pizza, I finished it with fresh oregano.
As a side note, this pizza is how I found out that the pizza stone can withstand the self clean oven cycle. I was so caught up in wondering whether it would turn out well that I FORGOT the parchment paper. The pizza stuck to the peel and ended up flipping over all over the stone and the bottom of the oven. Initiate full-blow meltdown. After what seemed like half an hour of cursing, but was probably 2 minutes, I decided to set the oven on self clean and pray that my stone didn’t crack. Having it already heated to 500 degrees probably helped, and I didn’t open the oven door until the next morning to allow it to fully cool and not shock it with cold air. It worked brilliantly! there was some ash to sweep out, but the oven and the stone were clean and intact. So there’s a lesson for you – DO NOT forget the parchment paper. I tried again the next night and got it right.
Jim Lahey No-Knead Dough
500 grams (17 ½ ounces or about 3 ¾ cups) all-purpose flour, plus more for shaping the dough
1 gram (1/4 teaspoon) active dry yeast
16 grams (2 teaspoons) fine sea salt
350 grams (1 ½ cups) water
In a medium bowl, thoroughly blend the flour, yeast, and salt. Add the water and, with a wooden spoon or your hands, mix thoroughly.
Cover the bowl with plastic wrap or a kitchen towel and allow it to rise at room temperature (about 72°F) for 18 hours or until it has more than doubled. It will take longer in a chilly room and less time in a very warm one.
Flour a work surface and scrape out the dough. Divide it into 4 equal parts and shape them: For each portion, start with the right side of the dough and pull it toward the center; then do the same with the left, then the top, then the bottom. (The order doesn’t actually matter; what you want is four folds.) Shape each portion into a round and turn seam side down. Mold the dough into a neat circular mound. The mounds should not be sticky; if they are, dust with more flour.
If you don’t intend to use the dough right away, wrap the balls individually in plastic and refrigerate for up to 3 days. Return to room temperature by leaving them out on the counter, covered in a damp cloth, for 2 to 3 hours before needed.
For all pizzas – stretch the dough out gently into a circle, top lightly, bake on a pizza stone in a preheated 500 degree oven for 10 minutes.