Category: Recipes

Not Pasta – Veggie Julienne

Well Dined | Sauteed Vegetable Julienne

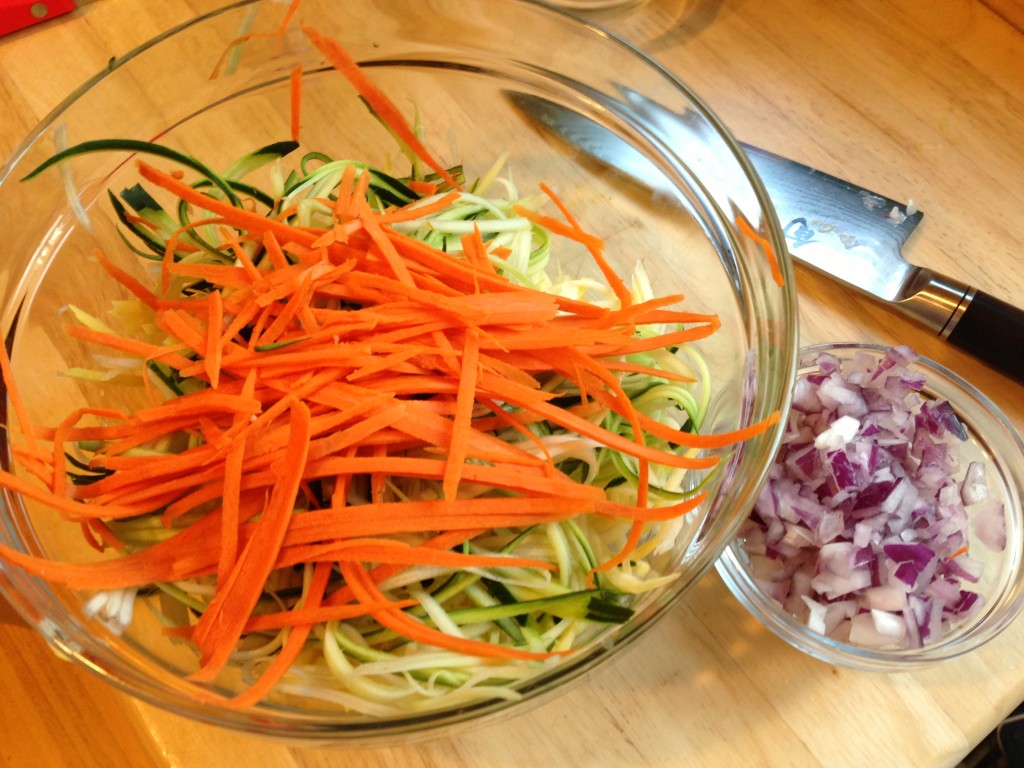
I am trying to eliminate, or at least greatly reduce, my carb intake.  But, man, I just really love pasta.  If anybody else is struggling with this, and I’m sure there are many, this is a really great recipe.  I know what you’re thinking – it’s not the same – and you’re right, it’s  not.  But I don’t think you will miss the pasta when you discover how much flavor and texture these have!

Well Dined | Sauteed Vegetable Julienne

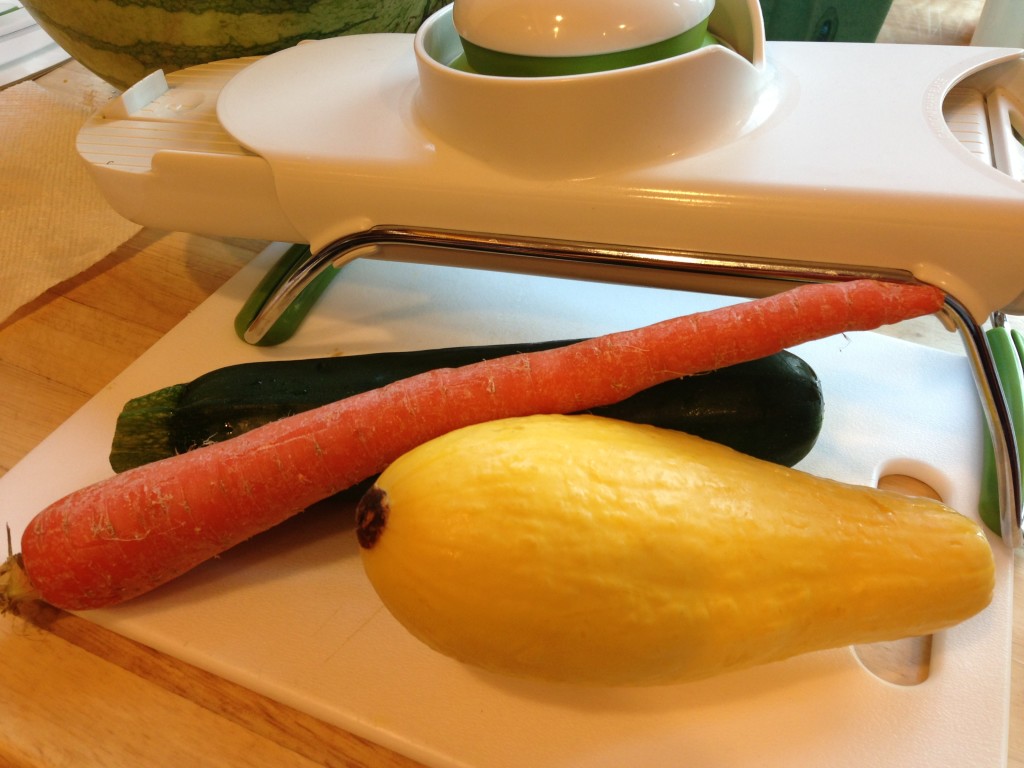
Mmmm – veggies.  I got my mandoline out, thinking it would make this a breeze, but it turns out that my particular one really sucks at using the whole length of the vegetable.  So I switched to this bad boy and it worked brilliantly.

Well Dined | Sauteed Vegetable Julienne

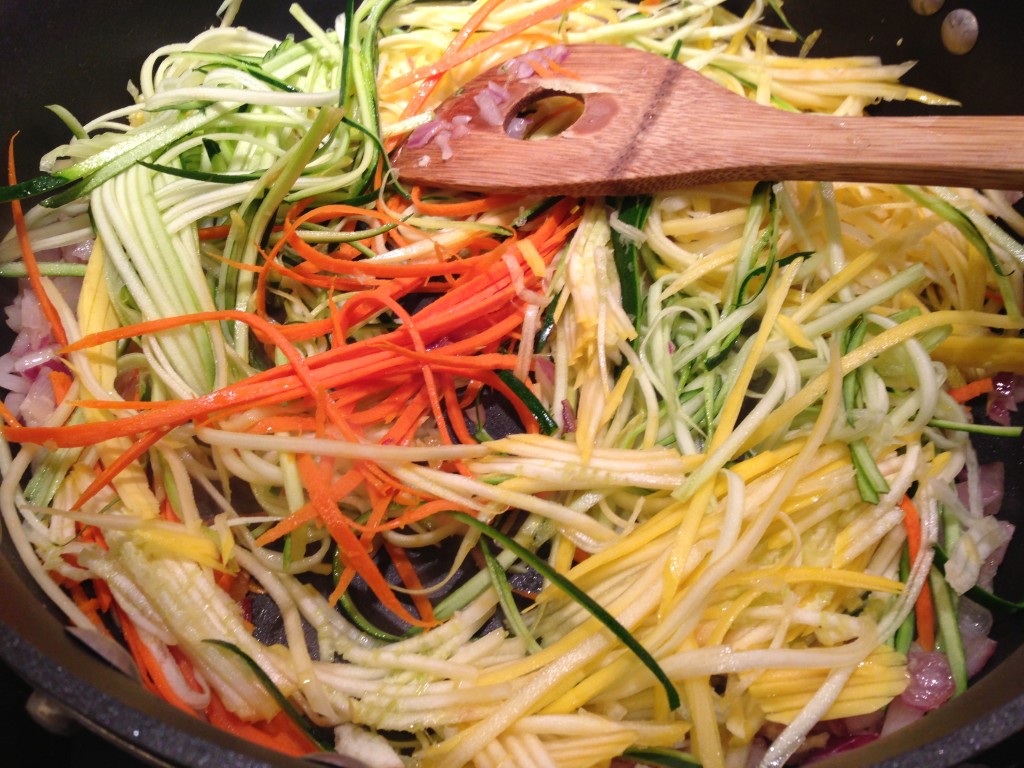
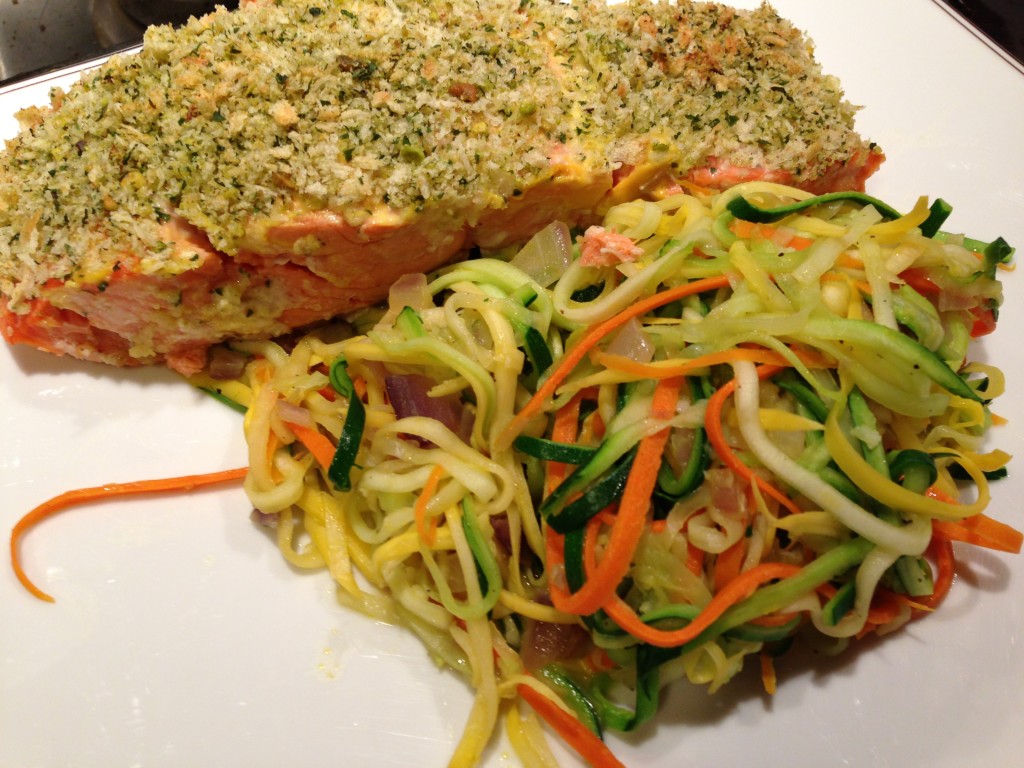
The colors!  Now I really like using spaghetti squash if I have a great sauce, but this recipe has more color and flavor, making it great on its own.

Well Dined | Sauteed Vegetable Julienne

Bonus – I followed the recipe and used red onion and garlic, but I think that you could use shallot in place of both and make it even simpler!  Super bonus – it cooks in less than 5 minutes!

Sauteed Vegetable Julienne
adapted from Skinny Taste
serves 2-4

1 tbsp olive oil
1/4 cup red onion, diced
3 cloves garlic, minced
8 oz zucchini, cut into julienne strips (with a mandolin or peeler)
8 oz yellow squash, cut into julienne strips (with a mandolin or peeler)
4 oz (1 medium) carrot, cut into julienne strips (with a mandolin or peeler)
salt and fresh cracked pepper, to taste

Heat a large nonstick skillet over medium heat.  Add the oil and onions and cook until fragrant, 2 minutes.  Add the garlic and cook for 30 seconds more.

Increase heat to medium-high and add the remaining vegetables, season with salt and pepper to taste, and cook until the vegetables are tender-crisp, about 2-3 minutes.  Adjust salt as needed and serve hot.
Melon Pops

Well Dined | Melon Pops

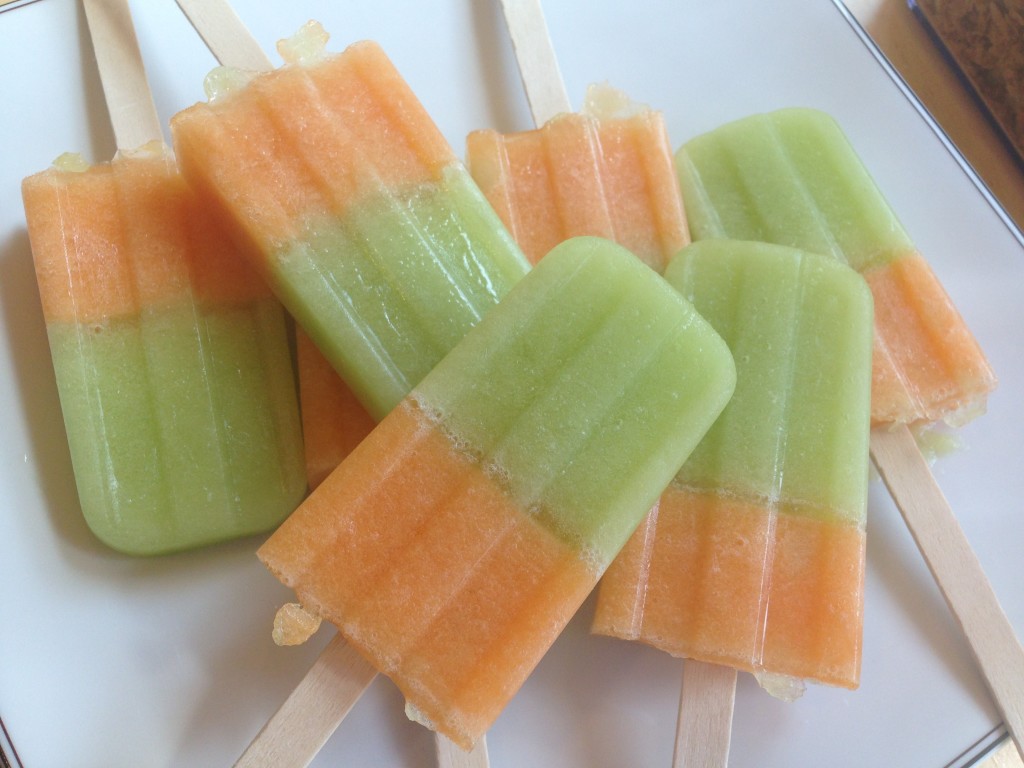
Here’s another quick, end of Summer post for you – melon pops!  Half cantaloupe, half honeydew, all yummy.

Well Dined | Melon Pops

They are made with just melon pureed with a little agave (optional).  The layering looks really cute, and is easy to do, but you could do whole pops of one or the other melon.  Quick, easy, healthy treats – yay!

Melon Pops
Makes 10 pops

1/4 cantaloupe, cubed
1/4 honeydew, cubed
agave, to taste (optional)

Place the honeydew cubes in a blender and puree.  Add agave, if using, keeping in mind that the pops will be less sweet when frozen.

Pour the honeydew mixture into an ice pop mold, being careful not to fill more than halfway.  Freeze until slushy, about an hour.  (Don’t be like me and let it freeze solid, preventing the layers from sticking together – doh!)

Repeat the process with the cantaloupe, being careful when adding it to the mold not to mix the layers.  Insert wooden sticks and freeze until solid.

Late Summer Stone Fruit

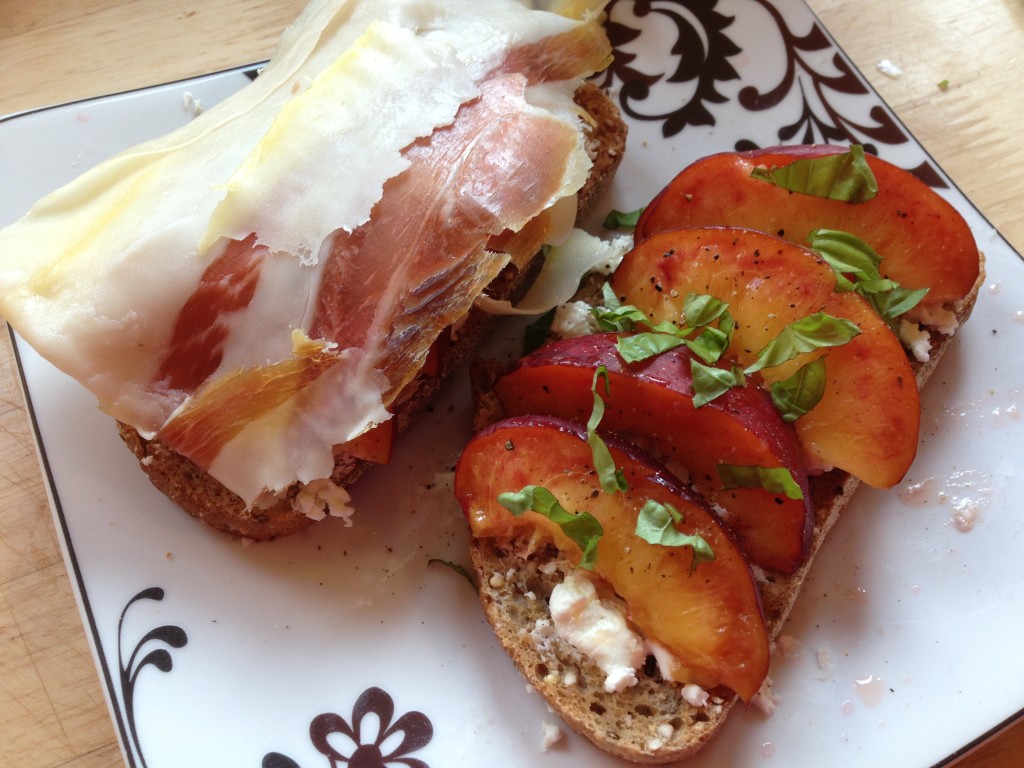
Well Dined | Prosciutto and Nectarine Tartine

Ugh – sorry folks, I’ve been bad about posting this last week!  And this post is going to be pretty short, too.  We are finally on our way into Fall, but the transition has been slow and there is still some stone fruit to be had.  I am still really into tartines at the moment, so I paired sliced nectarine with goat cheese, prosciutto, and basil for a quick lunch.

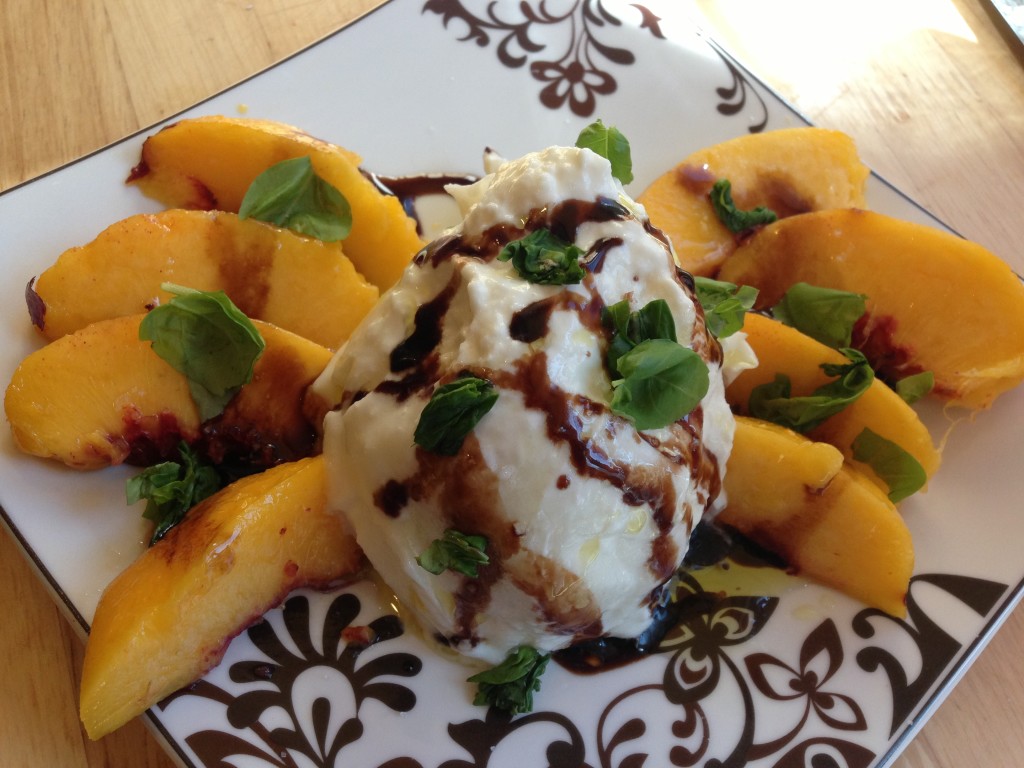
Well Dined | Burrata and Peach

Then the store finally had some burrata in (this is a seriously random occurrence, you never know), so I paired that with some ripe peach, basil, EVOO, balsamic, and sea salt.

One Pot Pasta

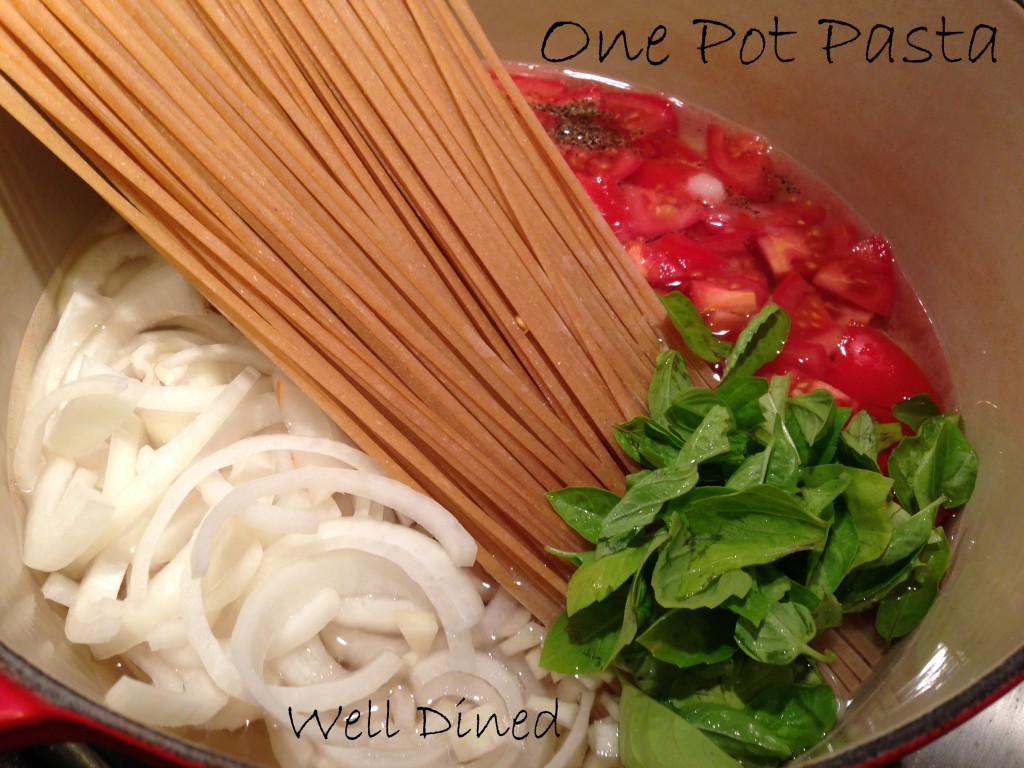
Well Dined | One Pot Pasta

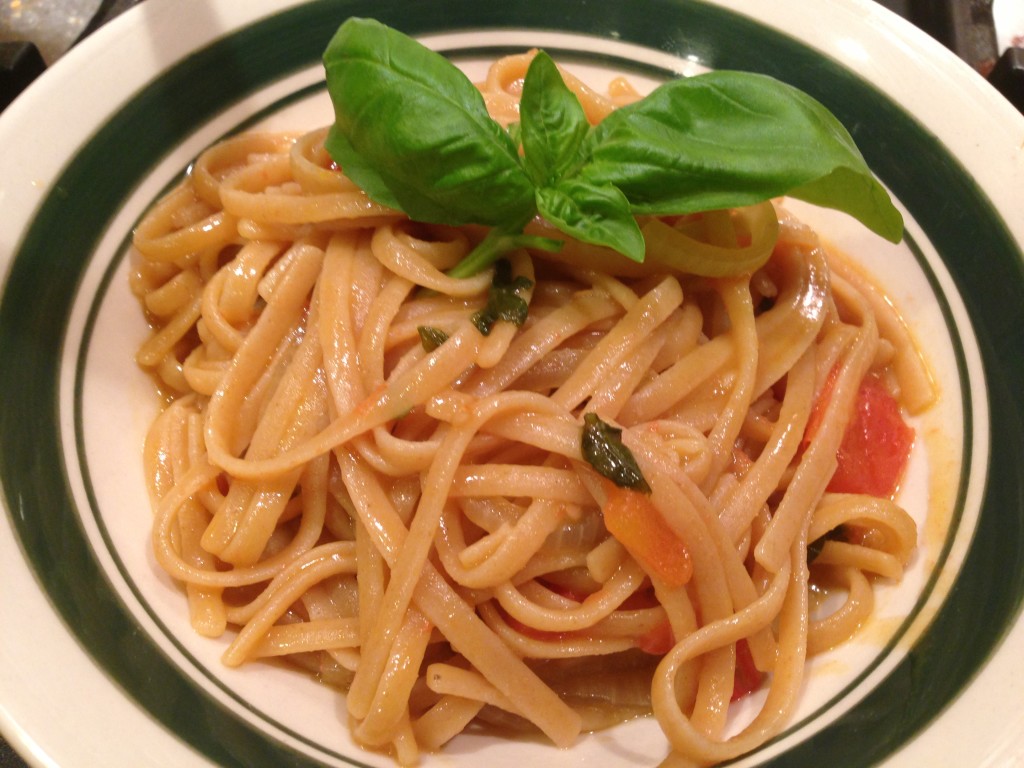
I saw this on Pinterest and thought it looked like a great idea!  Put a bunch of ingredients in a pot, boil it for 10 minutes, and the cooking water becomes the sauce – cool!

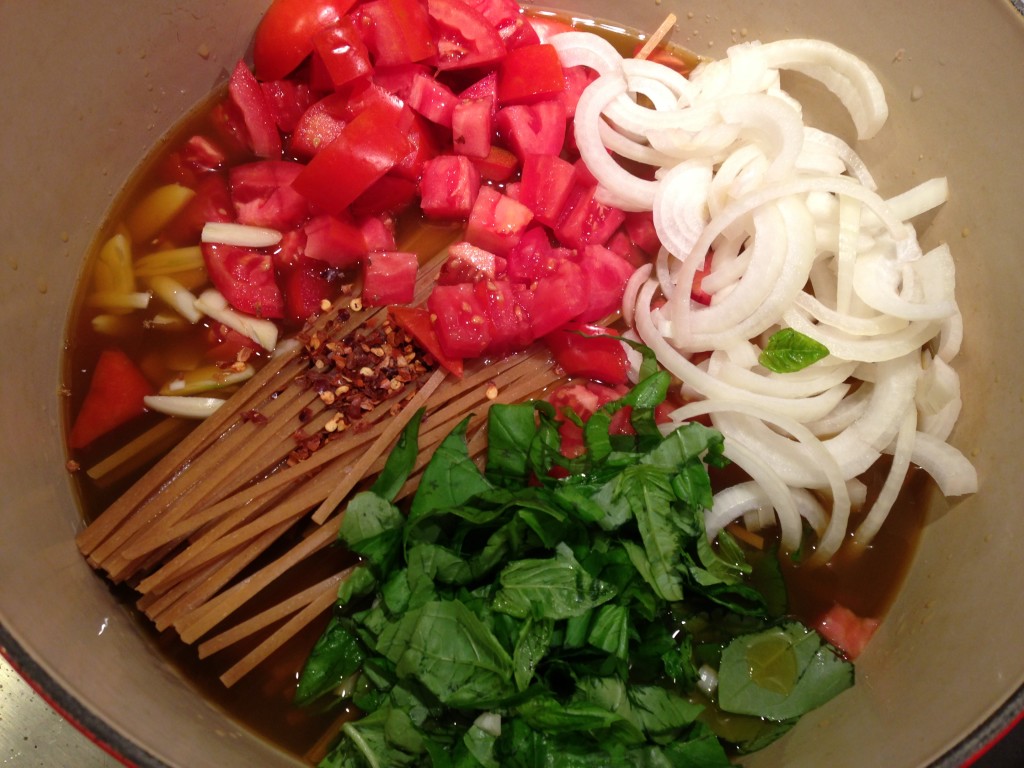
Well Dined | One Pot Pasta

Unfortunately, the first time I made this I followed another blogger’s recommendation and used vegetable stock instead of water for extra flavor.  Big mistake.  The stock I used was darkly colored and had a very strong flavor.  The end result ended up tasting like pasta with gravy – gross.  The soupy flavor totally overwhelmed the tomato and basil, and it was really just not good.

Well Dined | One Pot Pasta

But it seemed like such a good idea that I wanted to give it another try.  Water, not stock, this time; and no red pepper flakes (too spicy for me).

Well Dined | One Pot Pasta

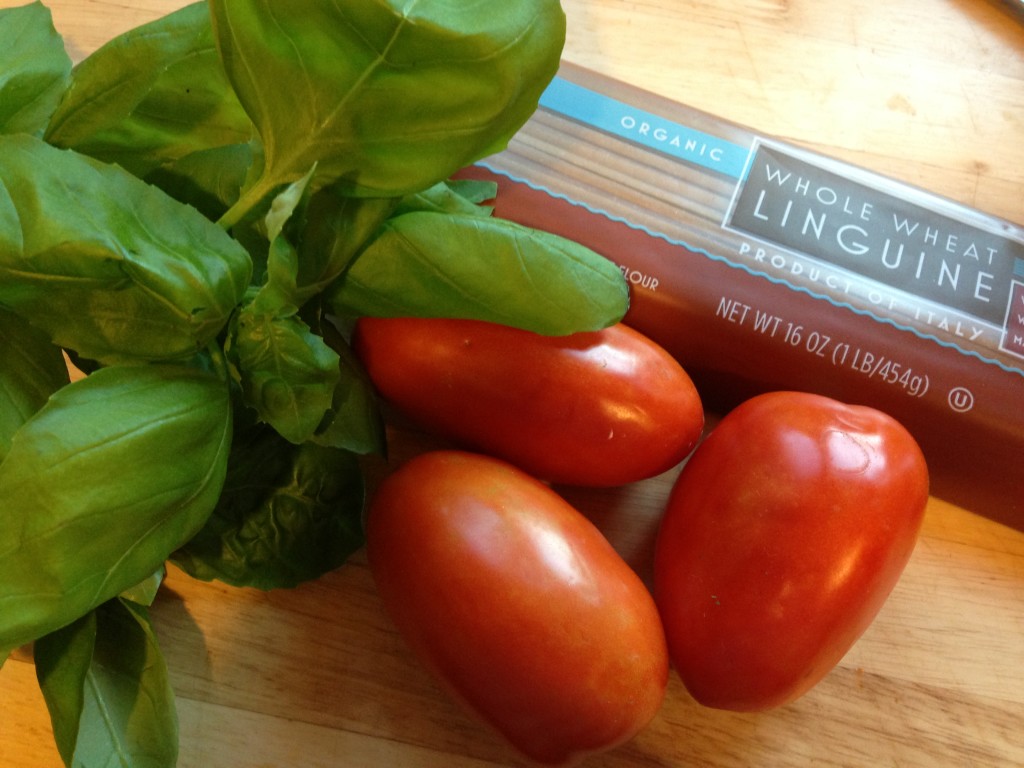
This time it worked great!  The starchy pasta water cooks down and clings to the pasta like a sauce, and the tomato basil flavor is nice.  I still prefer a traditional Pomodoro, but this is great if you don’t have a lot of time and only want to use one pot.  Some things to keep in mind – stir frequently or it will stick to the bottom; make sure to cut the onion really super thin because it doesn’t cook for very long; fresh roma tomatoes will give you the best flavor; and don’t break your pasta to make it fit into the pot, after the water starts to boil the ends will become soft enough for you to fold the pasta down. (more…)

Vegan Chocolate Coconut Cake

Well Dined | Vegan Chocolate Coconut Cake

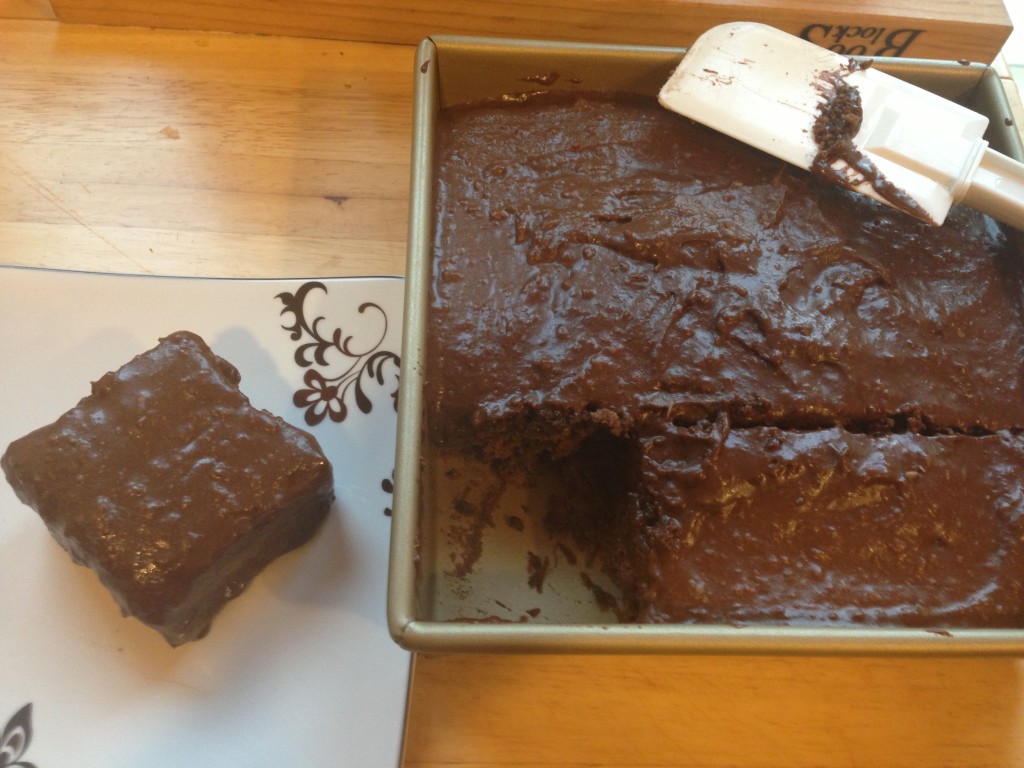
This recipe I found claimed to be for vegan fudge brownies.  Let’s be honest – this is not a recipe for brownies.  It is, however, a delicious recipe for cake – even more delicious if you use coconut oil to give it some extra flavor.  Coconut oil is just the neatest product!  Good for your health, good for your skin and hair, it’s even good as a supplement for dogs!  It turns from solid to liquid with a very small difference in temperature.  Heat or chill for just a few seconds to achieve the different states.  Of course if you don’t like coconut flavor, use a neutral tasting oil and vegan spread instead.  Vegan friends and chocolate lovers in general – make this right now, you won’t be sorry!

Vegan Chocolate Coconut Cake
adapted from Southern In Law
makes 9-16 small servings

For the cake:
2 cups flour
1/3 cup cocoa
1 tbsp baking powder
2/3 cup brown sugar
1/2 tsp salt
1/3 cup coconut oil, liquid form
1 3/4 cup unsweetened vanilla almond breeze

For the frosting:
6 tbsp coconut oil, solid form
6 tbsp cocoa powder
2 2/3 cup icing sugar/powdered sugar
2 tsp vanilla extract
2-4 tbsp unsweetened vanilla almond milk

Preheat oven to 355°F; grease and/or line an 8×8 cake pan.

In a large bowl mix together flour, cocoa, baking powder, sugar, and salt.  Add in oil and almond milk and stir until combined.

Pour brownie batter into cake pan and bake for 25-35 minutes or until cooked through and a skewer inserted removes clean.

Cool completely on a wire rack.

Make the frosting: in a bowl combine coconut oil and cocoa powder.  Gradually mix in icing sugar, vanilla, and add almond milk as needed to create your desired consistency.

Frost the cooled cake.  Keep stored in the fridge in an airtight container and eat within 2 days.  If you want to top it with some shredded coconut or slivered almonds, I bet that would be delicious.

Roasted Bone Marrow

Well Dined | Bone Marrow

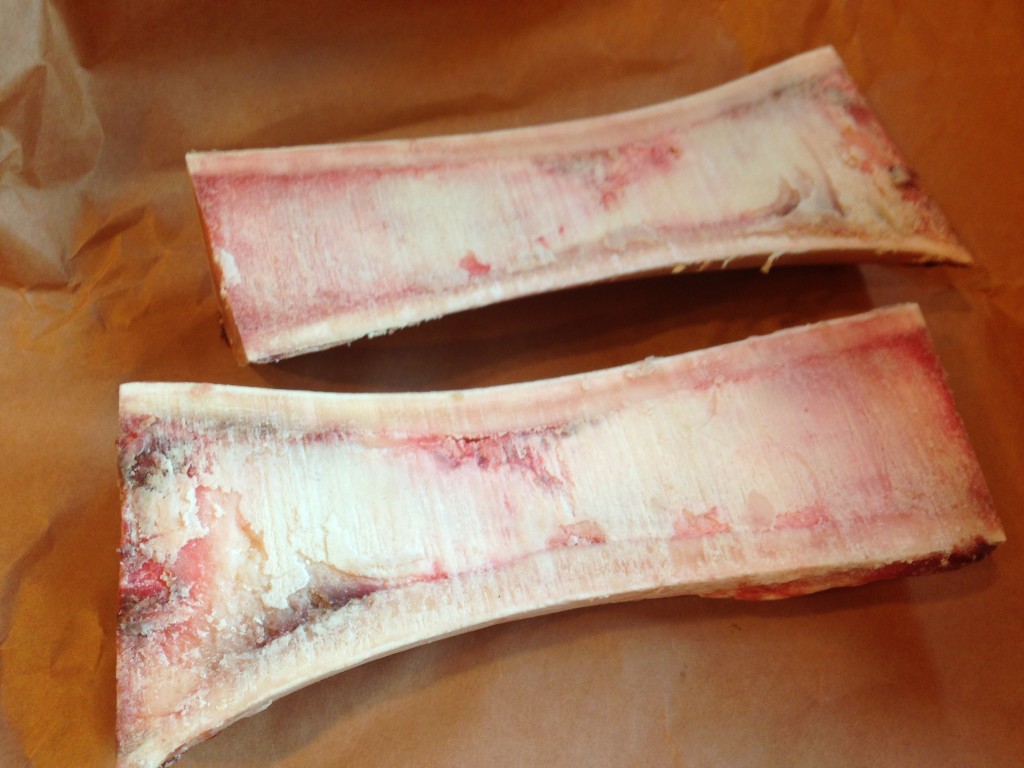
The other day, I was perusing Red Apron Butchery and saw that they had marrow bones.  I LOVE marrow, but I had never made it at home before.  It was time to fix that!  You might be interested to know that while marrow is made up of fat, it is largely unsaturated; plus it has lots of vitamins and minerals like iron and Vitamin A, and it has been shown to boost the immune system!

Well Dined | Bone Marrow

Now you actually want to soak these bad boys in salt water overnight to draw out the blood.  It’s not going to kill you or anything if you don’t, but it won’t taste as good.

Well Dined | Bone Marrow

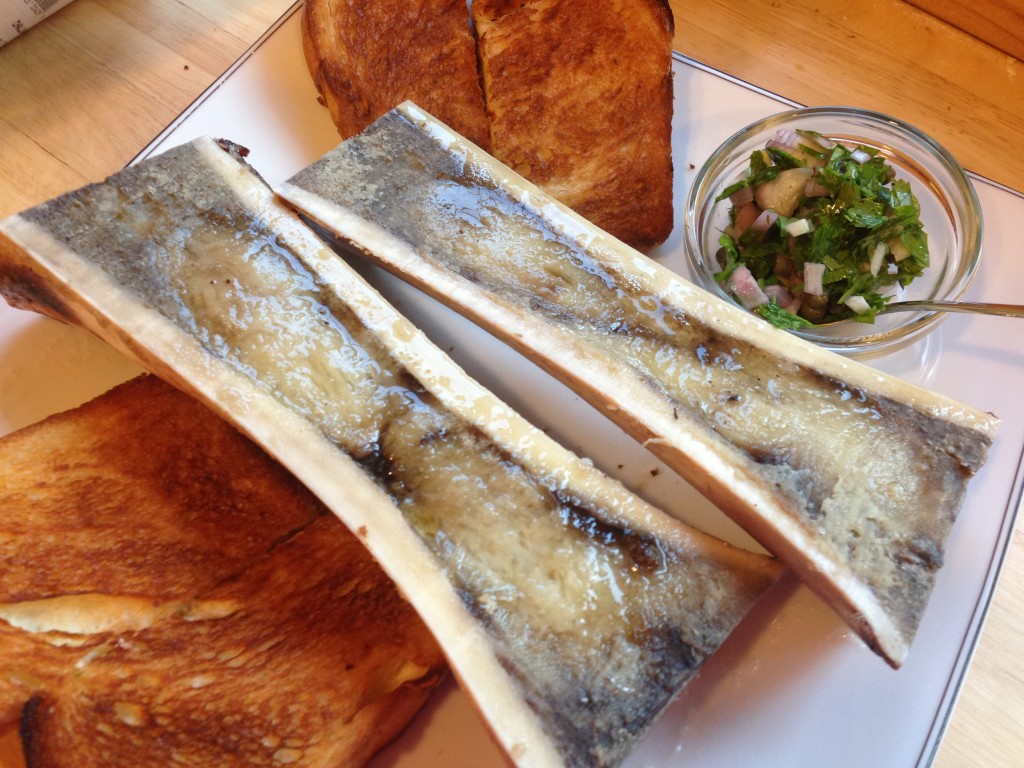
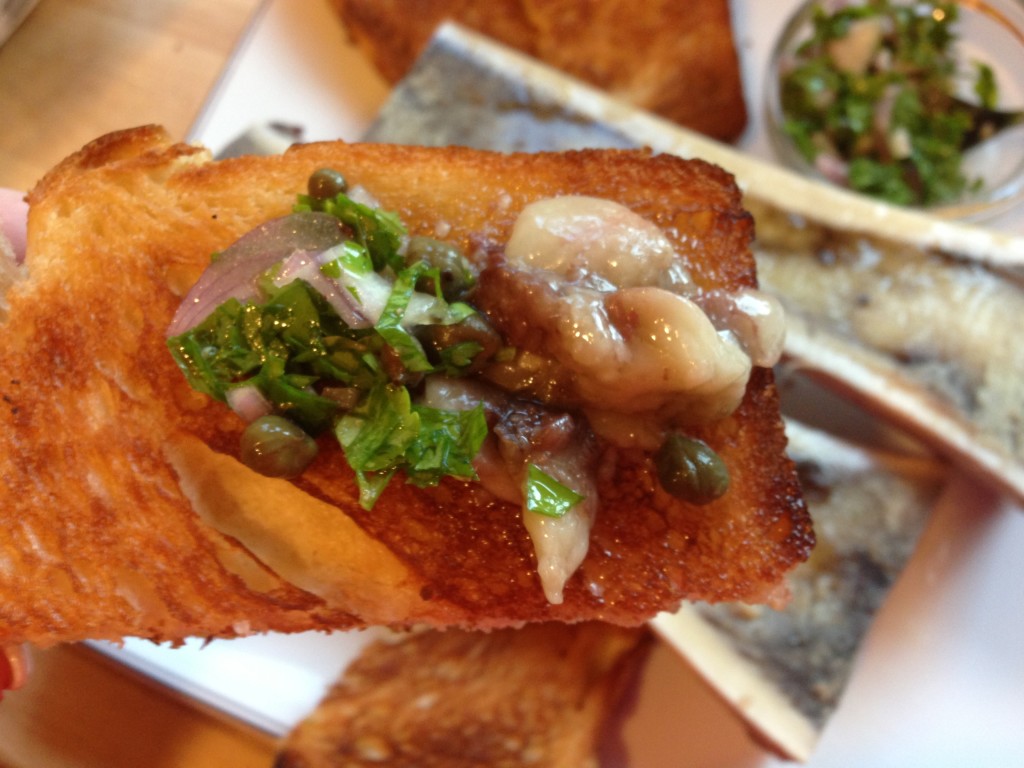
Then you just pop them into a hot oven and roast for 20 minutes.  You could just sprinkle it with coarse salt and eat it with a spoon, I wouldn’t blame you.  But if you want the full experience, spread it onto some toasted challah bread and top with a tangy parsley salad to balance out the rich fattiness.  Prairie butter, poor man’s foie gras, pure heaven – whatever you want to call it, this stuff is delicious decadence.

Roasted Bone Marrow
serves 4

8 3′-4′-long pieces beef or veal marrow bones (cut lengthwise or crosswise, doesn’t matter)
1 cup fresh flat-leaf parsley, roughly chopped
2 small shallots, thinly sliced (about 1/3 cup)
2 tbsp extra-virgin olive oil
1 tbsp fresh lemon juice
1 tbsp drained capers
Coarse sea salt and freshly ground black pepper
4 1/2-inch thick slices challah or rustic white bread, toasted

To remove the blood from the marrow, place the bones in a bowl of ice water with 1 tsp coarse sea salt per 1 cup water. Refrigerate for 12 to 24 hours, changing the water every 4 hours and replacing the salt each time. Drain and refrigerate until you are ready to cook the marrow. Be sure to use it within 24 hours or freeze the drained bones for up to 3 months.

Preheat the oven to 450°. Place bones in an ovenproof skillet or roasting pan – wider cut side down for crosswise, cut side up for lengthwise. Roast bones until marrow is soft and begins to separate from bone but before it begins to melt, 15-20 minutes, depending on thickness of bones. Sprinkle with sea salt.

Meanwhile, toss parsley, shallots, oil, lemon juice, and capers in a medium bowl to coat. Season salad to taste with sea salt and pepper.

Serve bones with toast and parsley salad. Use a long, thin spoon or knife to scoop marrow onto toast and top with salad.

Raspberry Yogurt Ice Pops

Well Dined | Raspberry Yogurt Ice Pop

After much Pinterest envy, I finally bought a popsicle mold (at the end of the summer, good job).  Did you know that “popsicle” is actually a brand name that we in the US have adopted to describe all ice pops?  I didn’t.  It’s one of those weird things like calling all facial tissue “Kleenex”.  Anyway the very first thing I wanted to try was a blackberry and yogurt recipe.  But I was worried about the seeds, and then the store ended up not having any blackberries.  So I bought raspberries instead.  Plain Greek yogurt, sweetened with a little agave, and layered with muddled raspberries (clearly my layering skills need improvement) – simple, fresh, delicious.  As far as sweets go, this is pretty good for you and I bet kids would love it!

Raspberry Yogurt Ice Pops
adapted from Real Simple
makes 10-12, depending on mold

1 3/4 cups plain full-fat Greek yogurt
6-8 tbsp agave nectar
3/4 pound raspberries (about 3 cups)

Whisk together the yogurt and 3 tbsp agave in a medium bowl.  In a separate bowl, combine the blackberries and the remaining 3 tbsp agave and mash with a fork or potato masher until coarsely crushed.  Taste the mixtures and add more agave as needed, keeping in mind that it will taste less sweet when frozen.

Layer the yogurt and blackberry mixtures (starting with the yogurt mixture, but don’t make as big a layer as I did), dividing evenly among 4oz paper cups or ice-pop molds.  Drag a toothpick or skewer through the mixtures to create a swirl effect.  Insert ice-pop sticks and freeze until firm, at least 3 hours and up to 4 days. Remove from the freezer 10 minutes before serving to soften slightly.  Or dip into warm (not hot) water to release.  You can unmold all of the popsicles and store them in a plastic bag in the freezer.

Veggie Based Pasta Sauces

Well Dined | Roasted Beet Pasta Sauce with Ricotta and Herbs

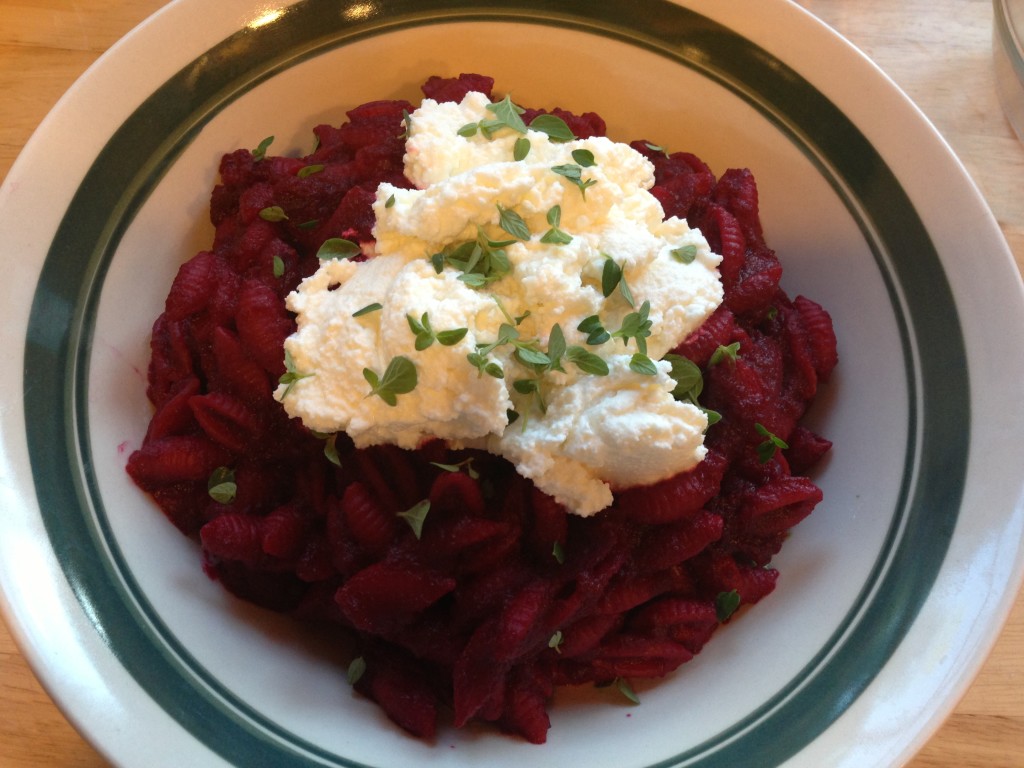
I’ve been doing this thing lately where I pretend that making a pasta sauce out of vegetables makes up for the fact that I am eating pasta.  Leave me to my delusions, I’m not ready to face the truth.  I have three such recipes for you today, and the first is this gorgeous roasted beet sauce that will make your pasta intensely fuschia.  Simply roast some beets, allow to cool slightly, peel, and puree with some starchy pasta water.  Toss with cooked pasta, season, and serve.  I topped mine with ricotta and fresh oregano.

Well Dined | Broccoli Cream Sauce

Next up is a broccoli sauce – what could be more healthy than broccoli?  I am not really used to broccoli because my father is allergic and we never really had it growing up.  My poor husband loves broccoli (shocking since he is NOT a veggie eater), so I am trying to familiarize myself.

Well Dined | Broccoli Cream Sauce

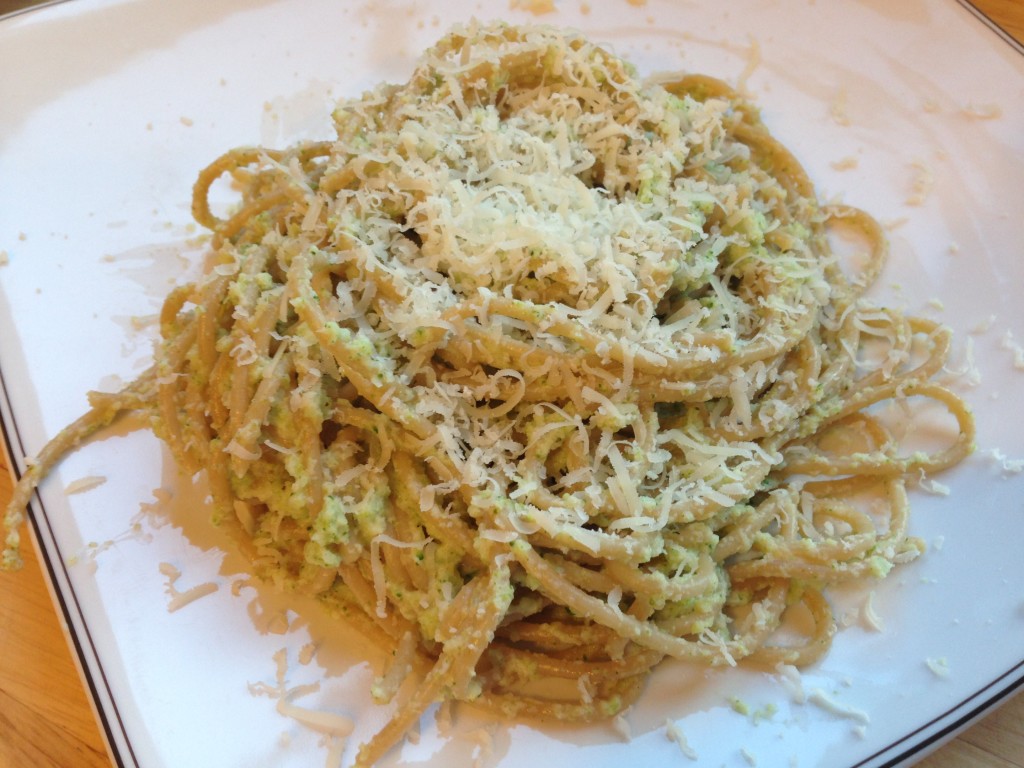
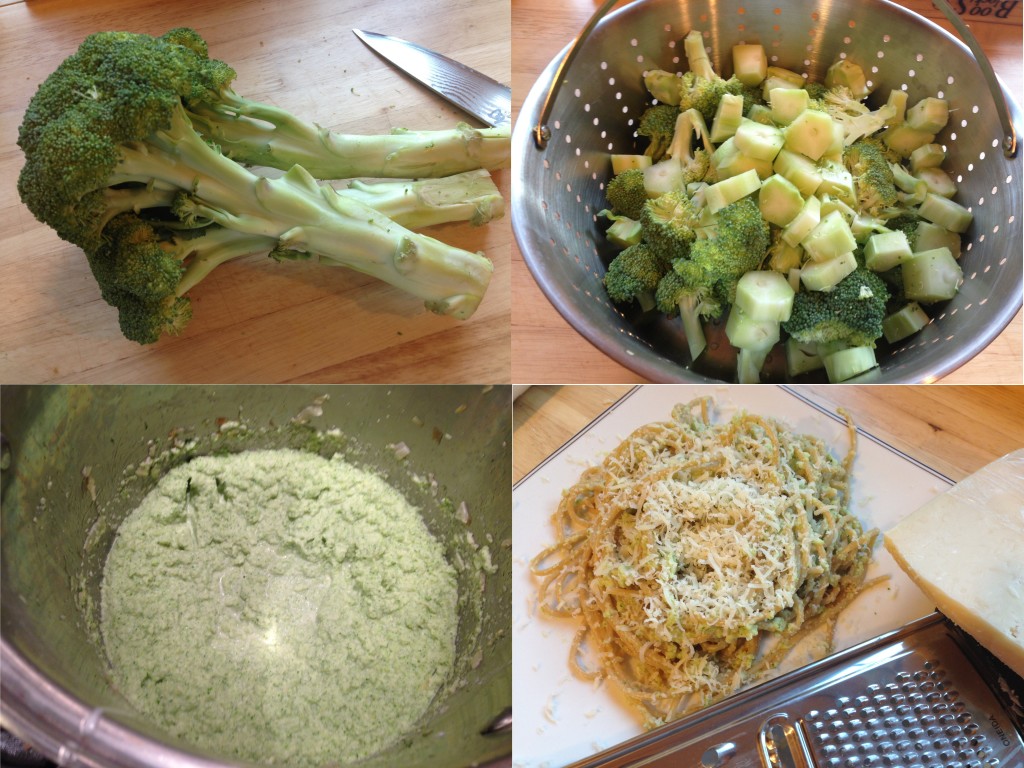
Did you know that you should peel broccoli?  I didn’t.  Apparently the outside part is tough and bitter.  Anyway, peel and chop the broccoli, steam, and then saute with butter, onion, and garlic.  Add some cream, puree, and toss with pasta and a bit of that magical pasta water.  Top with a gratuitous amount of Parmesan.  And before you start yelling at me – know that many vegetables need to be eaten with fat in order to allow the body to fully absorb the nutrients – FACT.

Well Dined | Roasted Red Pepper Alfredo

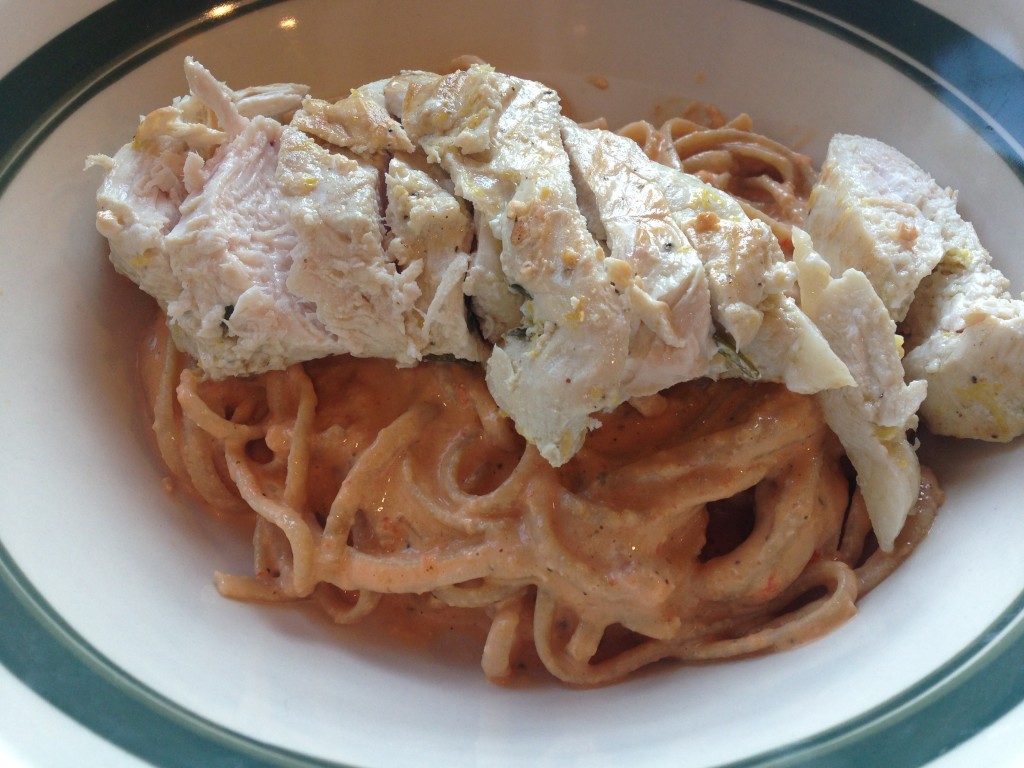
Lastly we have a roasted red pepper alfredo.  I think this one might be my favorite – super creamy and cheesy with a ton of roasted pepper flavor.  I topped it with grilled chicken that I marinated in olive oil, lemon juice and zest, garlic, rosemary, and oregano.

Well Dined | Roasted Red Pepper Alfredo

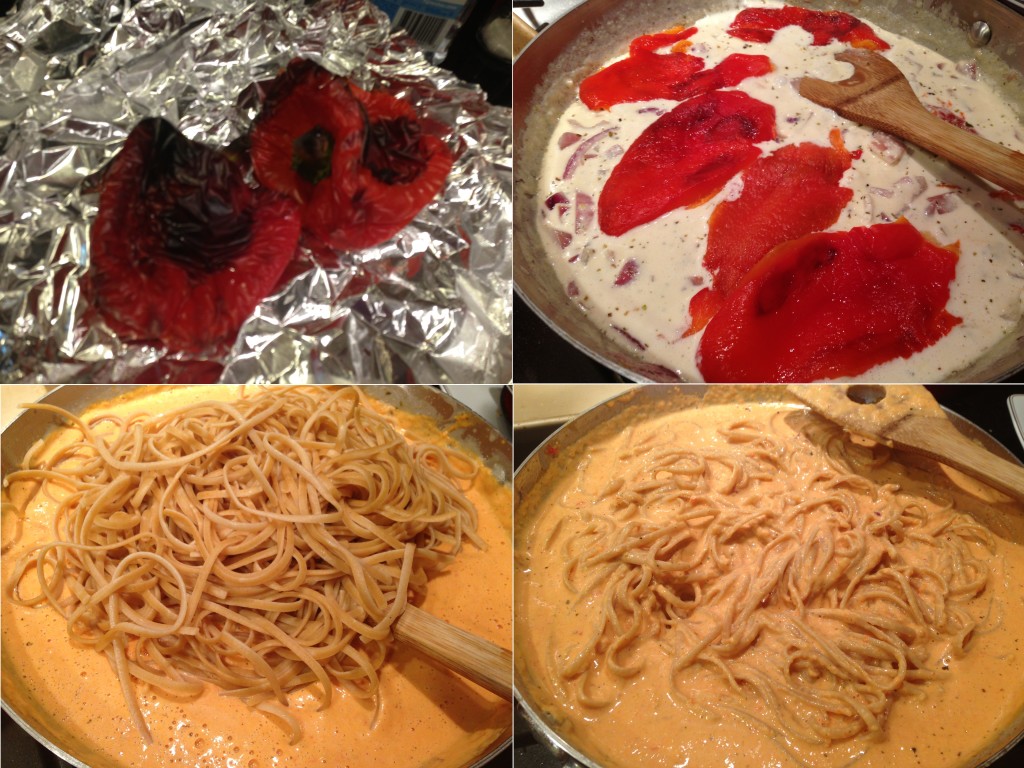
They sell roasted peppers in jars at the grocery store, but it turns out that it is super easy (and cheaper) to do at home – just pop them in a 500 degree oven for 30 minutes, allow to cool, then remove the stem, seeds, and core.  Toss the roasted peppers into a mixture of onion, garlic, half and half, herbed goat cheese, and Parmesan; puree and enjoy. (more…)

Summer Pizzas

Well Dined | Tomato and Burrata Pizza

I really love authentic Italian pizza.  The kind with the thin crust that gets blistered and charred in the wood oven.  My favorite place to get it around here is Pizzeria Orso, but I have been trying to make it at home.  Step one is to get a pizza stone.  I leave mine on the bottom rack of the oven.  As long you are heating it with the oven (not sticking a cold stone into a hot oven) it will be totally fine to leave it in there all the time.  In fact, heating it frequently will help keep it clean by burning any spills to dust.  I’ve even left it in there on the self clean mode – totally fine and now very clean!  It will take longer for your oven to preheat with the stone in it, but it will help keep the temperature even and constant.  You will also need a pizza peel to transfer the pizza to the stone.

Well Dined | Jim Lahey Dough

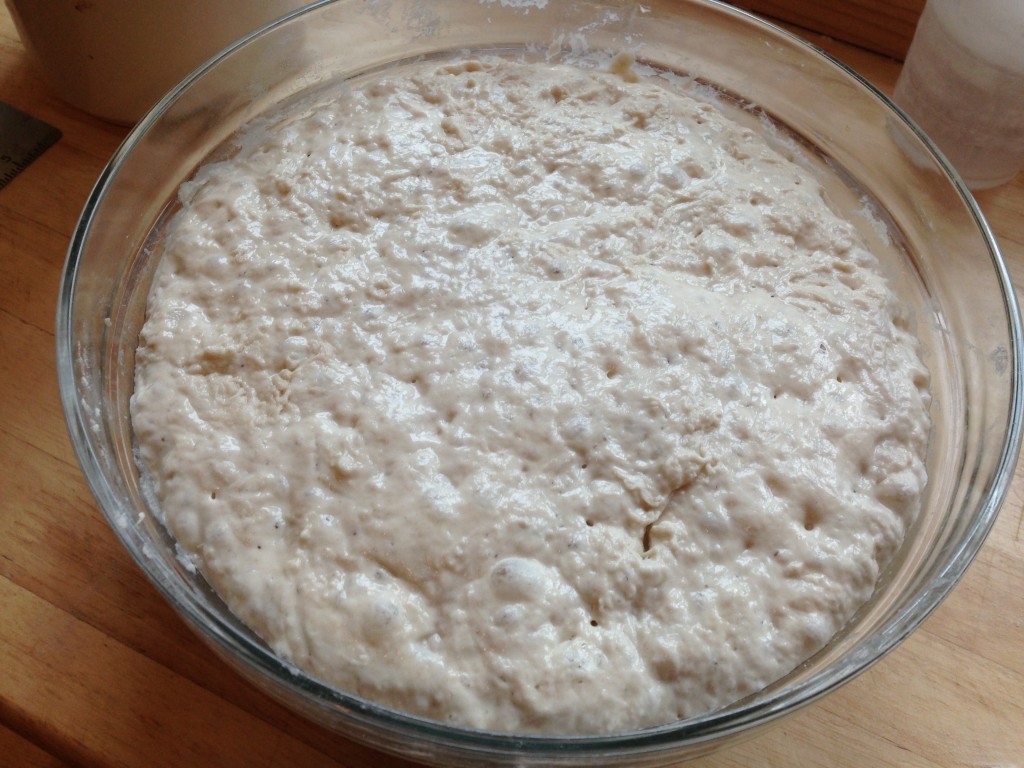
Step 2 for great pizza – great dough.  I have tried many doughs, including whole wheat ones.  For authentic pizza – this Jim Lahey dough is the best.  It takes a long time to make though, so be prepared.  The idea behind this dough is that the tenderness and pocketed texture come from fermenting the dough (for 18 hours, I told you it takes time!), and then handling it as little as possible.  That means no kneading!

Well Dined | Jim Lahey Dough

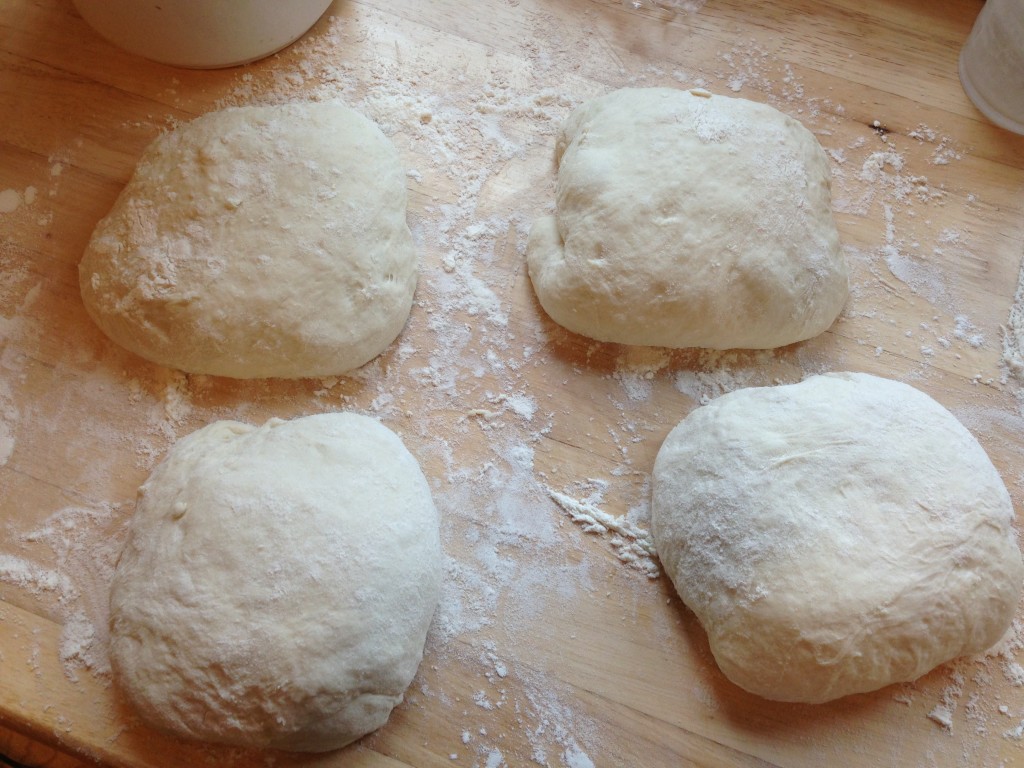
After letting the dough ferment (like sourdough starter), you carefully remove the dough from the bowl and place it on a floured surface.  Then you separate it into four parts and gently fold (not roll, or knead) the parts into balls.  Use them quickly or wrap tightly in plastic wrap and refrigerate.  This dough is only good for a couple of days so plan to make a lot of pizza!

Well Dined | Jim Lahey Dough

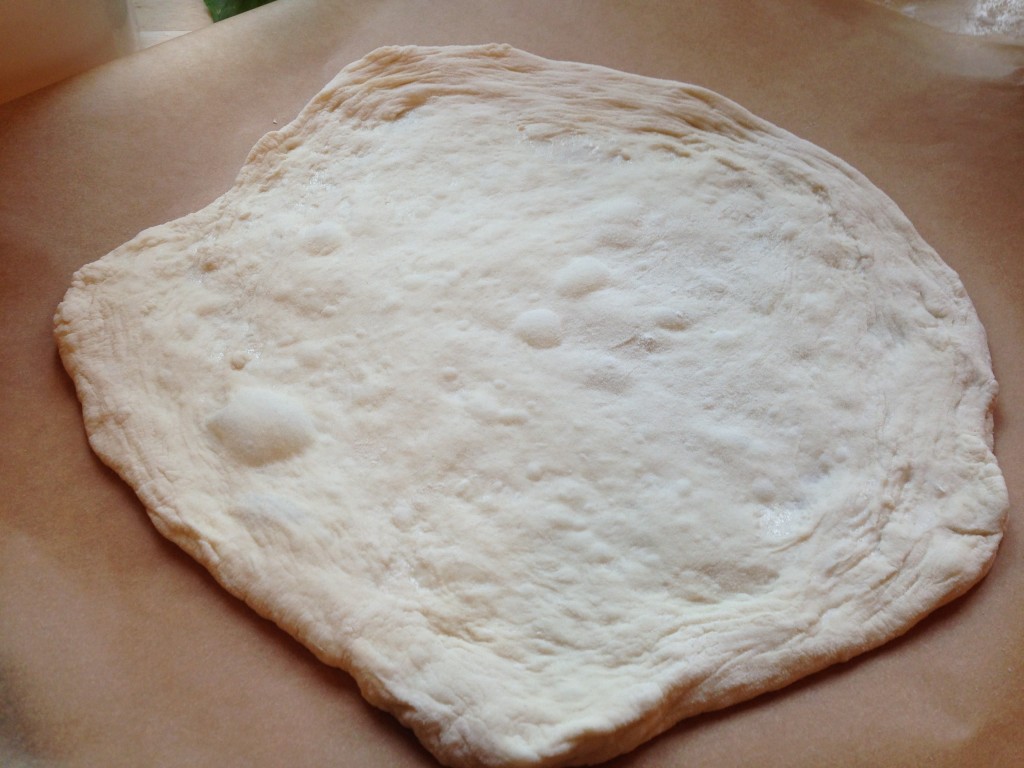
When you are ready to make the pizza (the oven and stone should be preheated at this point), carefully and gently stretch the dough.  Either in the air on your knuckles, or on a floured surface.  For some technique tips – check out this video.  See those bubbles in the dough, there?  That’s what you are trying to achieve.  Those will blister up and make your pizza awesome.  Here’s another handy trick – I always have trouble getting my pizza off the peel, no matter how much cornmeal I put on there.  So I have started putting the pizza onto parchment paper and sliding that onto the stone.  Then after about 2 minutes (you will smell it starting to char), I slide the parchment out from under the partially set dough – easy! (more…)

Summer Tartines

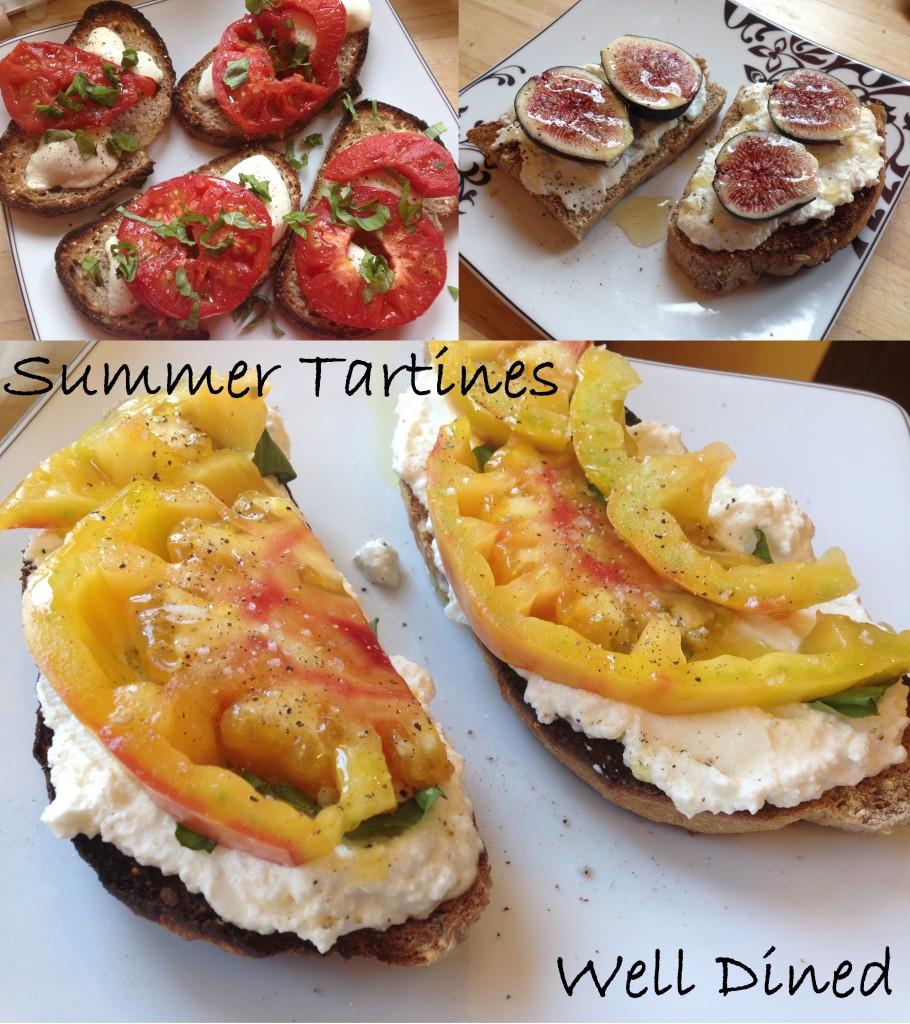
Well Dined | Summer Tartines

So for the past few weeks I have pretty much been living off of fresh summer produce and cheese piled onto whole grain seed bread.  It’s pretty much all I want to eat.  EVER.  The French call these open-faced sandwiches “tartines”.  I like that, it makes them sound fancy (when really they are super simple).

Well Dined | Fresh Tomato and Ricotta Tartine

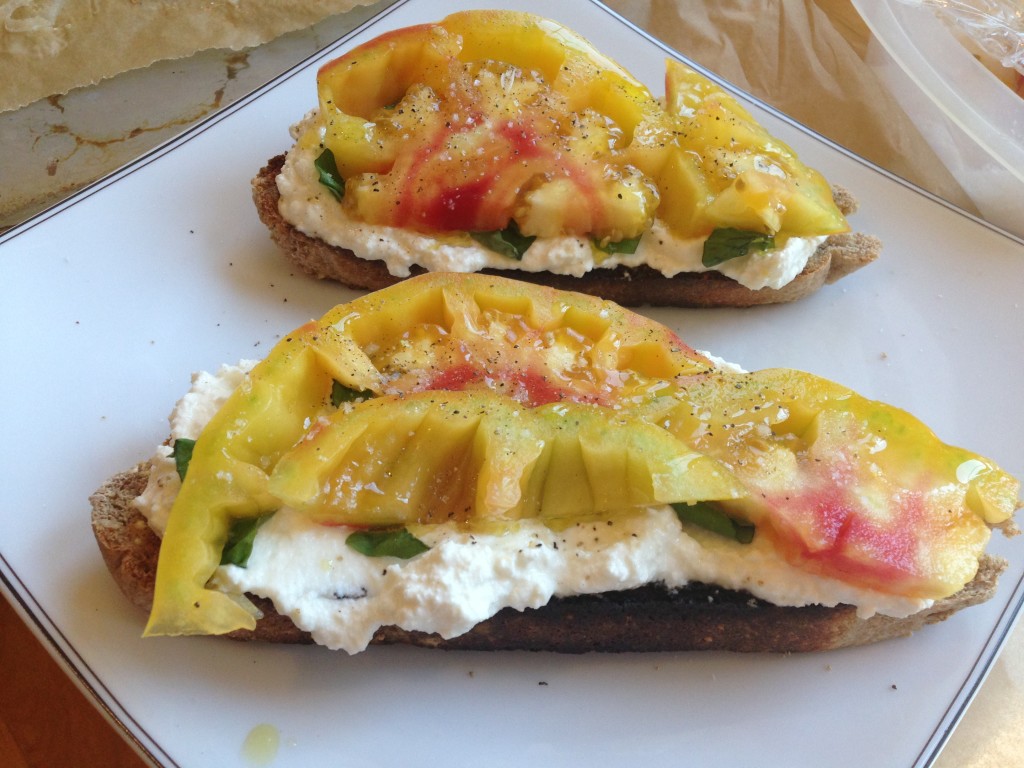
The farmers’ market has been bursting with huge, gorgeous heirloom tomatoes.  This beautiful yellow, green, and red tomato made it onto pizza (which I will post about soon) AND some lovely tartines.  I wanted to eat some of this super sweet and juicy tomato raw so I toasted some bread and topped it with creamy homemade ricotta, basil from my garden, slices of tomato, high quality EVOO, high quality sea salt, and fresh cracked pepper.  Super simple and sooooooo delicious.

Well Dined | Fig, Ricotta, and Honey Tartine

Next up I paired some fresh figs with more of that homemade ricotta, black pepper, and honey.  Whether for lunch, dessert, or a snack – this tartine is awesome.

Well Dined | Broiled Tomato and Mozzarella Tartines

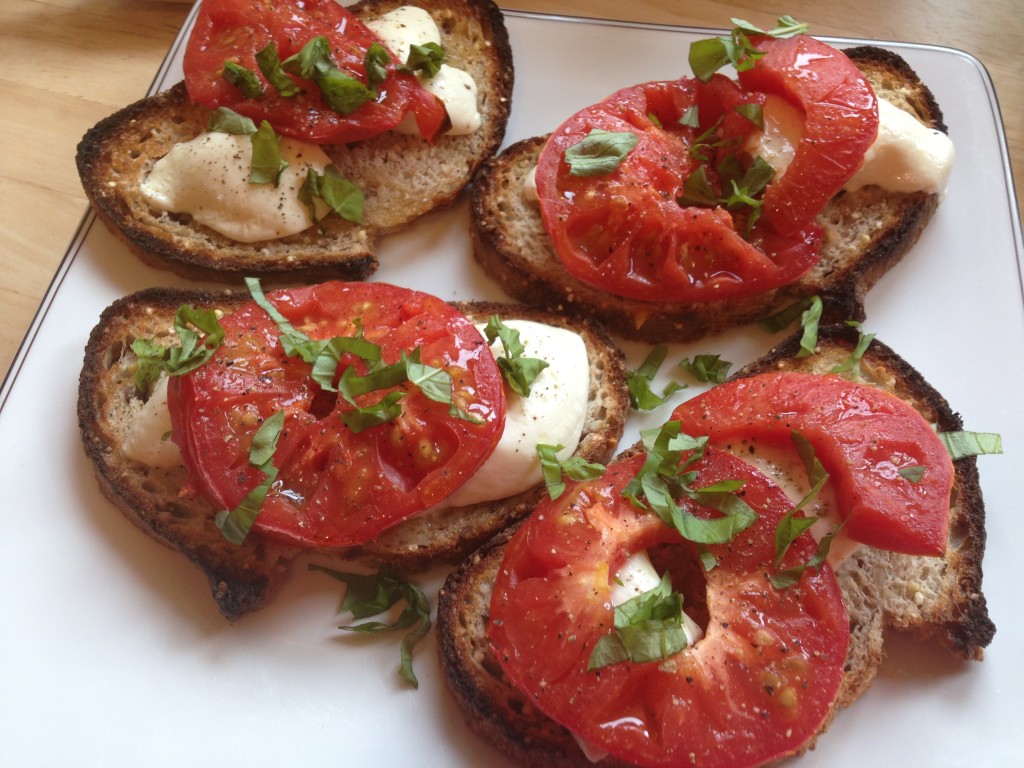
Lastly, I wanted to experiment with warm tartines and broiled tomatoes, so I placed sliced mozzarella and tomatoes on seedy whole grain bread, drizzled them with olive oil, and broiled them.  Then I topped them with fresh basil, salt, and pepper – yum!  Definitely very satisfying.

What are some of your favorite tartine ideas?  Leave them in the comments!